This post may contains affiliate links. We may earn a commission, at no additional cost to you, if you make a purchase via our links. See our disclosure for more information.
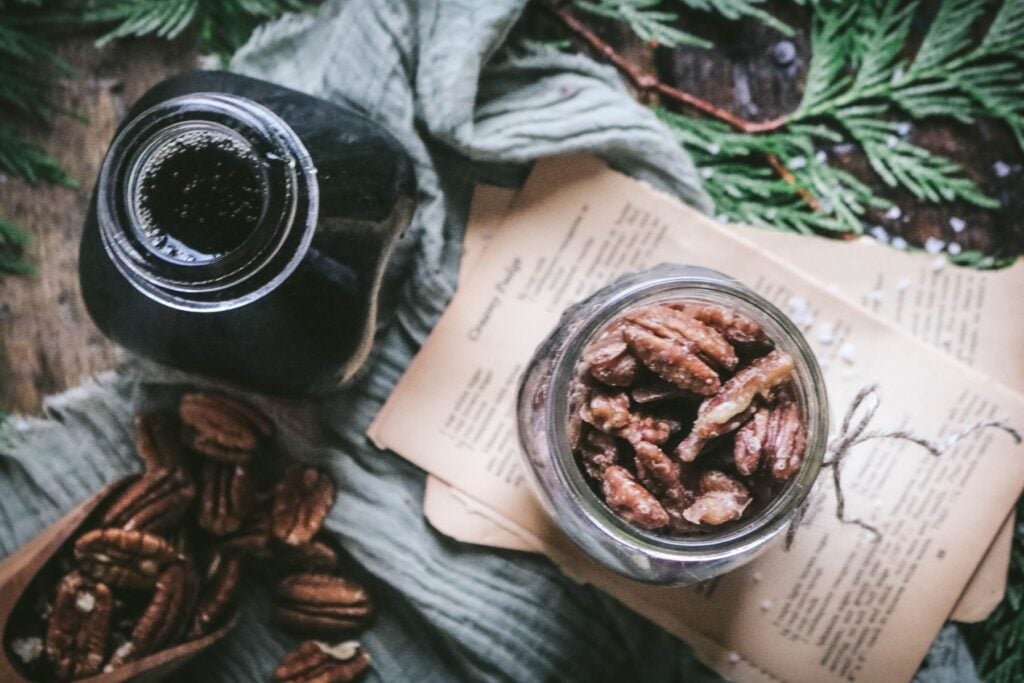
These sweet and crunchy maple pecans are absolutely irresistible – sweet, crunchy, with the perfect combination of two classic flavors. Make them to add to salads – or to jar up for homemade gifts – and you’ll definitely want to keep this recipe on hand. Follow my simple method (with pictures!) and you’ll pull them off perfectly!

For years, I’ve been intimidated by the process of making candied nuts. I love getting them from markets and holiday events, and thought the process would be way more complicated than it was.
Don’t I need egg whites? Or butter? Or some sort of fancy thermometer?
But really, it is so easy. We’re just stirring ingredients in a skillet – that’s it! Once you try it the first time, you’ll be hooked and want to make all different kinds of flavor variations.
I highly recommend making them on the stovetop so you can control the heat. Plus, it’s a nice way to get hands-on in the kitchen.
I’ve created some free printable gift tags for holiday gifting. Just keep scrolling and you’ll be able to grab them right after the recipe instructions.
If you love the combination of maple and pecans, you have to try these Brown Butter Maple Pecan Cookies. They taste like fall in cookie form! (Or these Maple Pecan Blondies. I dream about them sometimes.)

Ingredients
- Raw Pecan Halves – I’d use either whole pecans or halves to make sure you have large enough pieces to candy. They can be expensive; I usually get the 2lb bag at Costco for about $12.
- Real Maple Syrup – With just two ingredients, it’s essential to make sure you’re using the right ones. You need real, pure maple syrup for this recipe, not pancake syrup.
- Salt – Totally optional, but it offsets the rich sweetness.
How to Make Maple Pecans
Below, I’m going to give you a complete step-by-step with visuals so you know what to look for. Before you start, I want to make sure you understand the basic process.
All you’re doing is gently heating the mixture in a pan and stirring often. The goal is to evaporate any liquid in the maple syrup, which will give the nuts a crisp, hard shell. (You’re basically making maple sugar.)
If you don’t cook them long enough, the outside will be chewy, not crispy. Keep going until the maple syrup stops pooling in the bottom of the pan (see the pictures below).
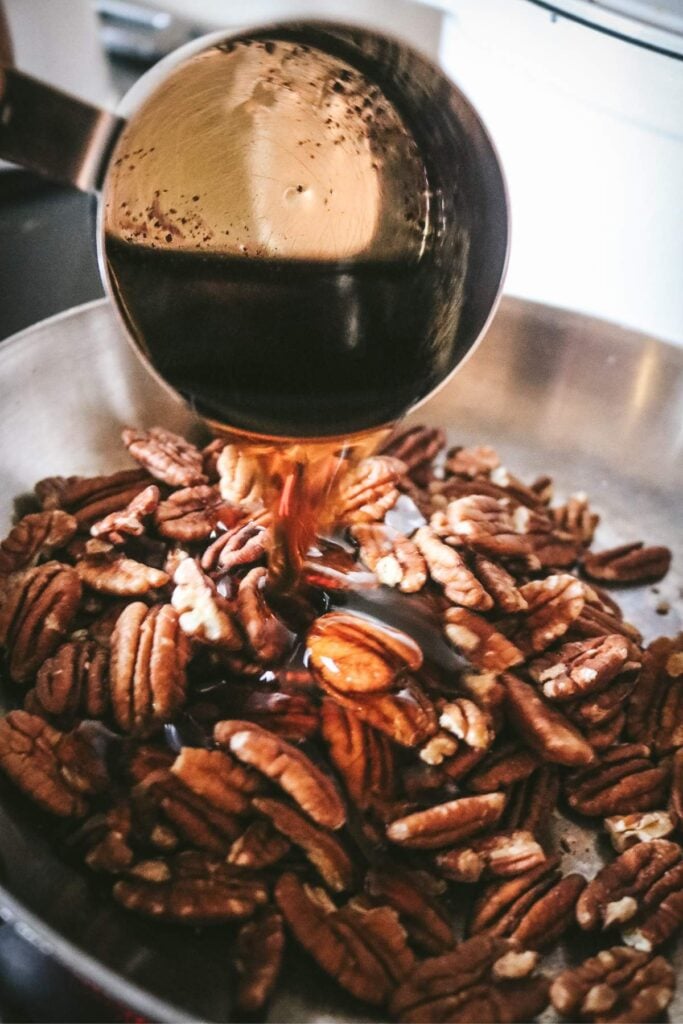
Step 1: Combine the pecans and maple syrup in a skillet. Heat over medium low heat (I do mine at setting 3 on my burner.) Line a half sheet pan with parchment paper or a silicone liner and set it to the side.
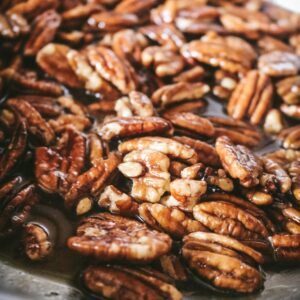
Step 2: Use a spatula to stir the mixture often. You don’t have to baby it if you’re cooking at low heat, but you don’t want to burn the mixture.
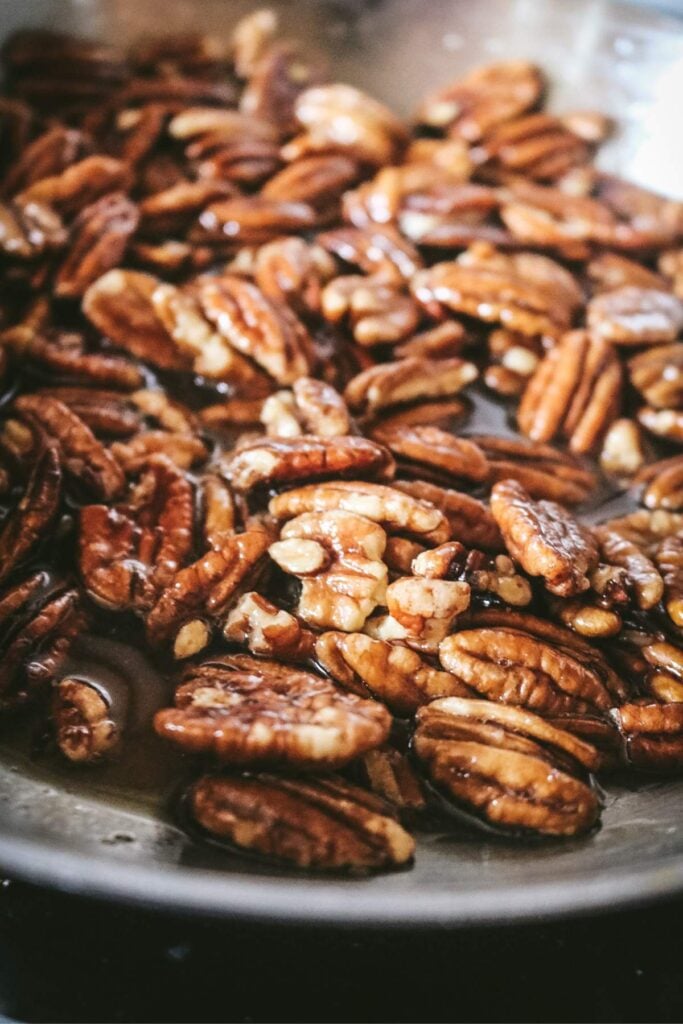
Step 3: As you stir, monitor the amount of maple syrup pooling on the bottom of the pan. The goal is to have no liquid maple syrup at the end. It will begin to thicken over time.

Step 4: There will be a point when the maple begins to bubble quickly. At this point, the maple syrup is thickening and the caramelization process is happening.
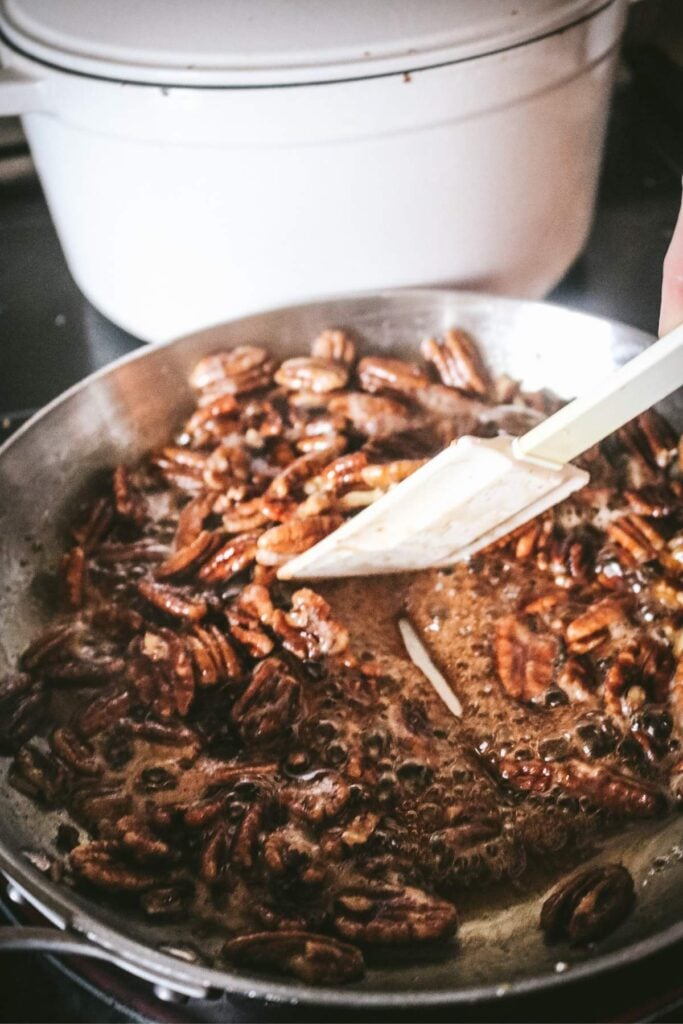
Step 5: Continue to stir often. Monitor the amount of maple syrup on the bottom of the pan. When it all goes away, you’re done.
I like to run the spatula through the mixture to see if any syrup pools in the center. If it doesn’t, you’re done.
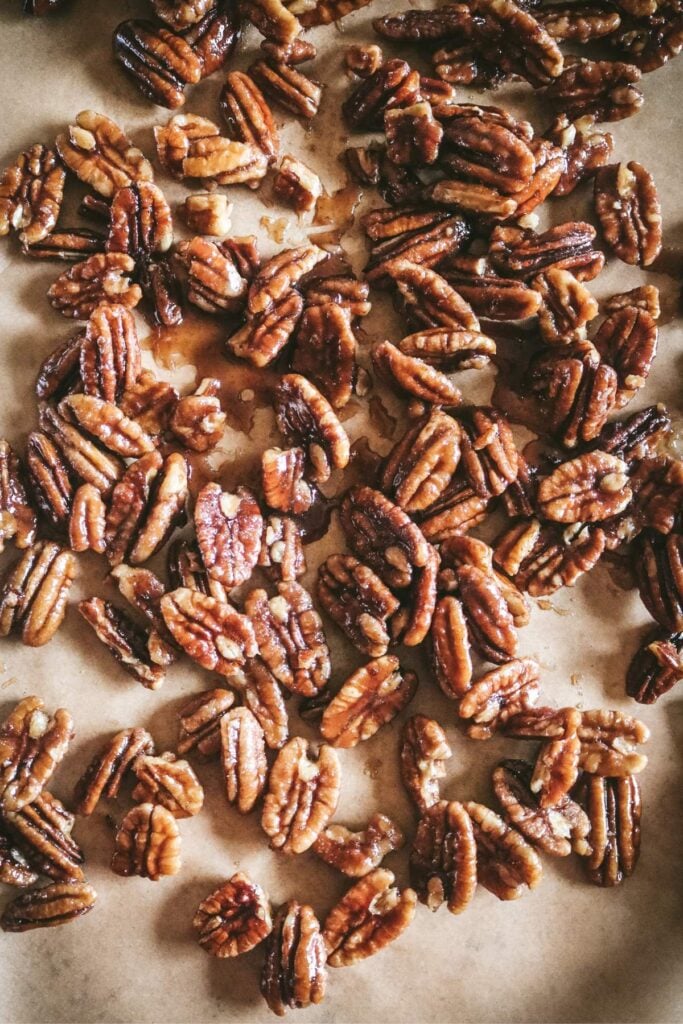
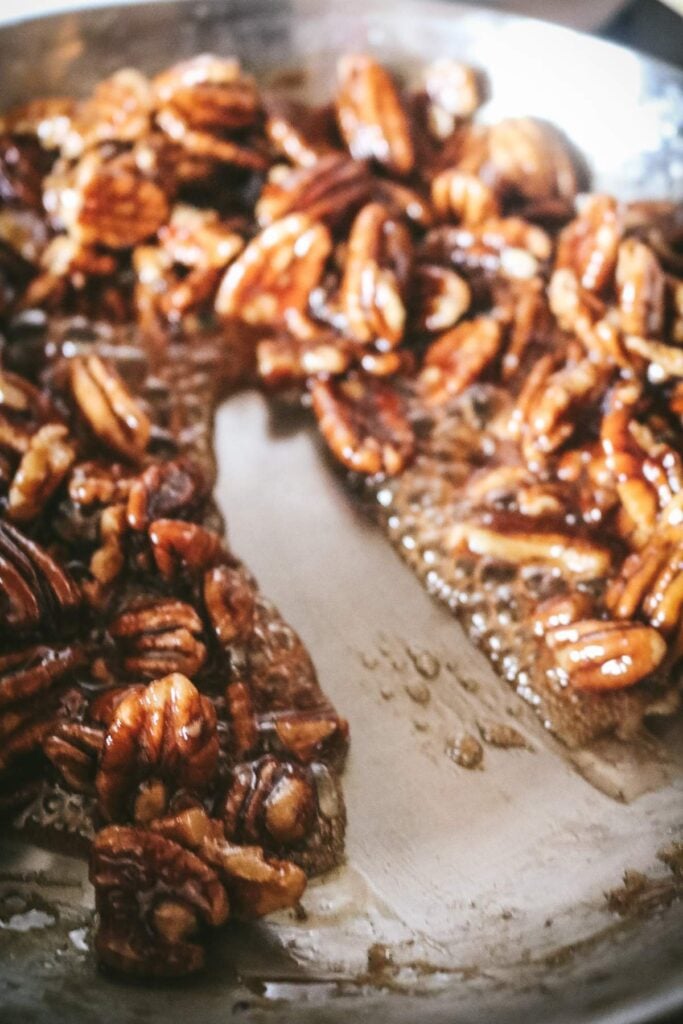
Step 6: Transfer the candied pecans to a sheet pan lined with parchment paper and spread in an even layer.
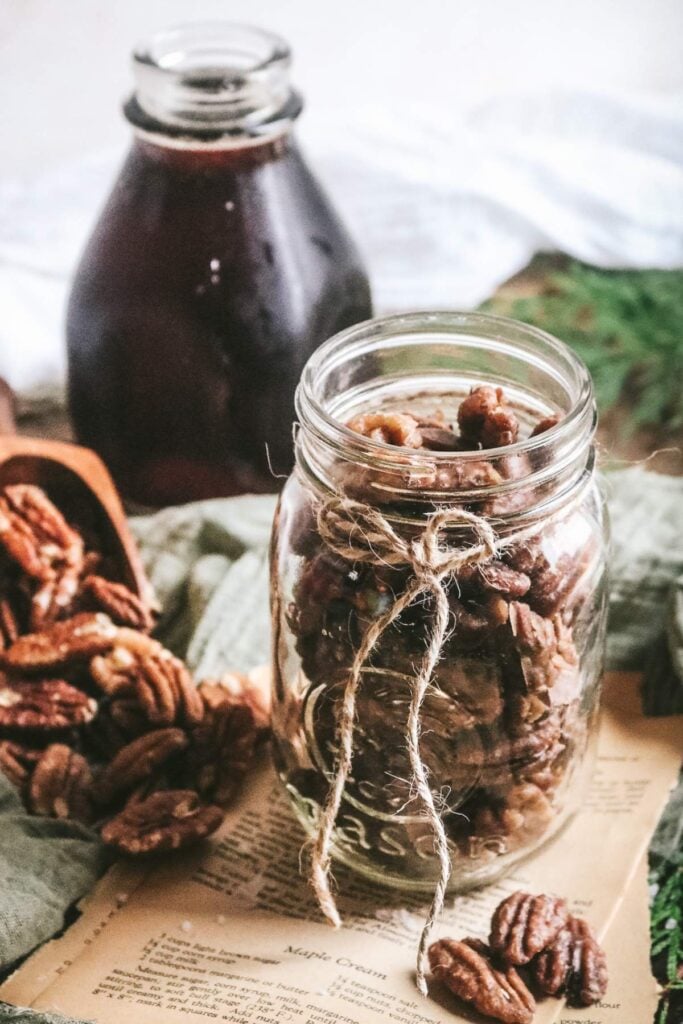
Be careful not to touch – the maple syrup is VERY hot at this time. Cool to room temperature, then transfer to glass jars or another airtight container. Enjoy!

Free Printable Candied Pecans Labels
Simply click the button below to view and download these printable gift tags. Each page has two sizes, and there’s no email required!
Storing Suggestions
The pecans need to be kept in an airtight container to avoid absorbing moisture from the air. I usually just put them in a glass food storage dish or a mason jar.
They’ll stay fresh for weeks (even up to months)!
Two Finish Options
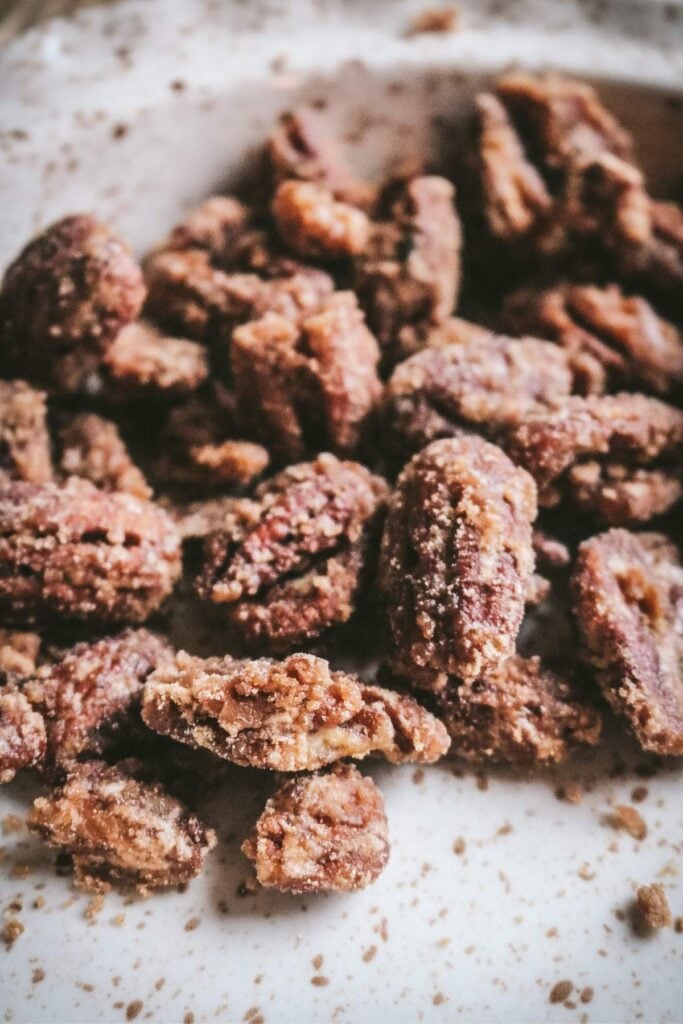
When I think of candied nuts, I usually picture them covered with that lumpy, bumpy, sugary mixture on the outside. I’ve found that you can easily replicate this yourself by continuing to stir the nuts AFTER the maple syrup has evaporated.
Just keep stirring and scraping down the sides of the pan.
Eventually, those dried out bits of maple syrup on the side of the pan will cling onto the pecans and give them that look and extra crunch. You’ll know it when it happens!
Tips & Variations
Make individual batches. Instead of crowding the pan and making a ton at once, simply make multiple batches. Yes, it is a little time-consuming but it’s worth it to get a consistent result. I suspect you could make a double batch if you made them in a large stockpot.
Add spices. I wanted to keep this recipe super simple and use the fewest amount of ingredients possible. But, you can absolutely doctor the nuts with different spices and seasonings! Try adding about 1 tsp of cinnamon, ginger, or even a dash of cayenne pepper for a little heat.
Try different nuts. This method works for all different nuts! Walnuts are a little cheaper than pecans, and would be a great alternative. Cashews would be incredible!
Although you can candy nuts in the oven, I haven’t played with that process for this particular recipe and recommend using the stovetop. It really makes it a lot easier to control.
You can also play with the method I used for these air fryer walnuts, which is similar but uses way less maple syrup and doesn’t actually candy the nuts.
How to Use Maple Pecans
I initially created this recipe to add to winter salads, but you’ll quickly find out how easy it is to nibble on a few here or there for a snack! They tend to go fast…
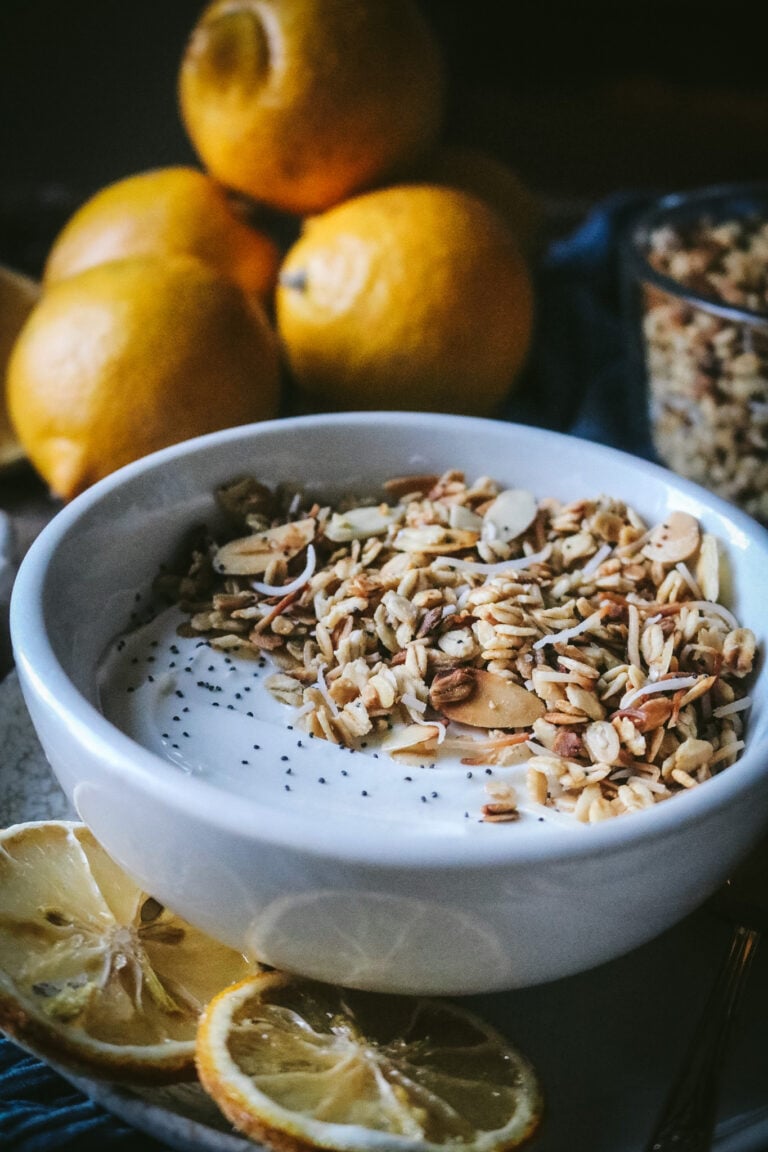
You can add them to granola, crumble a few over ice cream, sprinkle them on top of Maple Scones, or even add them to your holiday cookies.
Really though, they make an incredible homemade holiday gift. It’s something most people wouldn’t do themselves and you’re using such nice ingredients.
Jar or bag them up and tuck them into your holiday gift baskets!
If you made this recipe, please leave a comment or ask a question below! I’d love to hear what you think or troubleshoot any issues.
Get my FREE Homestead Kitchen Supply List to make it easier than ever to cook and bake from scratch.
Want more seasonal recipes? Subscribe for email updates or follow Milk Glass Home & Kitchen on social media. Join my Facebook Group Seasonal Slow Living to become part of the community!
Candied Maple Pecans
Equipment
- 1 large skillet
Ingredients
- 2 cups pecans
- 1/2 cup maple syrup
- 1 pinch kosher salt
Instructions
- Line a half sheet pan with parchment paper and set it to the side. Combine the pecans and maple syrup in a skillet. Heat over medium-low heat (I do mine at setting 3 on my burner.)
- Use a spatula to stir the mixture often. You don’t have to baby it if you’re cooking at low heat, but you don’t want to burn the mixture.
- As you stir, monitor the amount of maple syrup pooling on the bottom of the pan. The goal is to have no liquid maple syrup at the end. It will begin to thicken over time.
- There will be a point when the maple begins to bubble quickly. At this point, the maple syrup is thickening and the caramelization process is happening.
- Continue to stir often. Monitor the amount of maple syrup on the bottom of the pan. When it all goes away, you’re done. I like to run the spatula through the mixture to see if any syrup pools in the center. If it doesn’t, you’re done.
- Transfer the candied pecans to a sheet pan lined with parchment paper and spread in an even layer. Be careful not to touch – the maple syrup is VERY hot at this time. Cool to room temperature, then transfer to glass jars or another airtight container. Enjoy!
Notes
Did you try this recipe?
Post a photo and tag @milkglasshome!Pin this recipe for later!