This post may contains affiliate links. We may earn a commission, at no additional cost to you, if you make a purchase via our links. See our disclosure for more information.
If you love pumpkin pie, but don’t always want to go through the process of having to bake pies, make pumpkin pie pudding cups! This easy dessert has the creamy deliciousness of classic pumpkin pie but only takes a few minutes to assemble. Even better, these creamy pumpkin pudding cups are also gluten-free and refined-sugar-free!

I made this pudding recipe to be creamy without adding any egg yolks, so you don’t need to worry about tempering anything either. So easy! I actually intended for this recipe to be maple ginger pudding. On a whim, I added pumpkin purée, and let me tell you, it was a good idea!
I loved it so much that the next time I made it, I added way more homemade pumpkin puree for a true pumpkin pie experience. Now, these are a regular addition to my fall menu!
If you love pudding, I have three flavored from-scratch pudding mixes to replace the boxed mixes in your life. So much more flavor!
Why you’ll love these pumpkin pie pudding cups
Equipment
To make your own pumpkin pie pudding cups, you’ll need these everyday tools:
- Saucepan
- Whisk or hand mixer
- Spatula
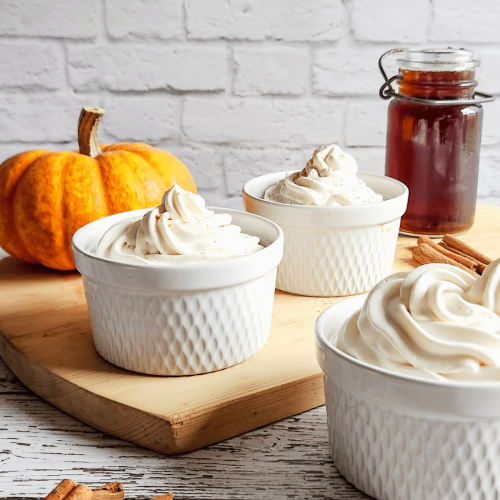
- Small serving dishes (Ramekins, jars, parfait glasses, or mugs)
Ingredients
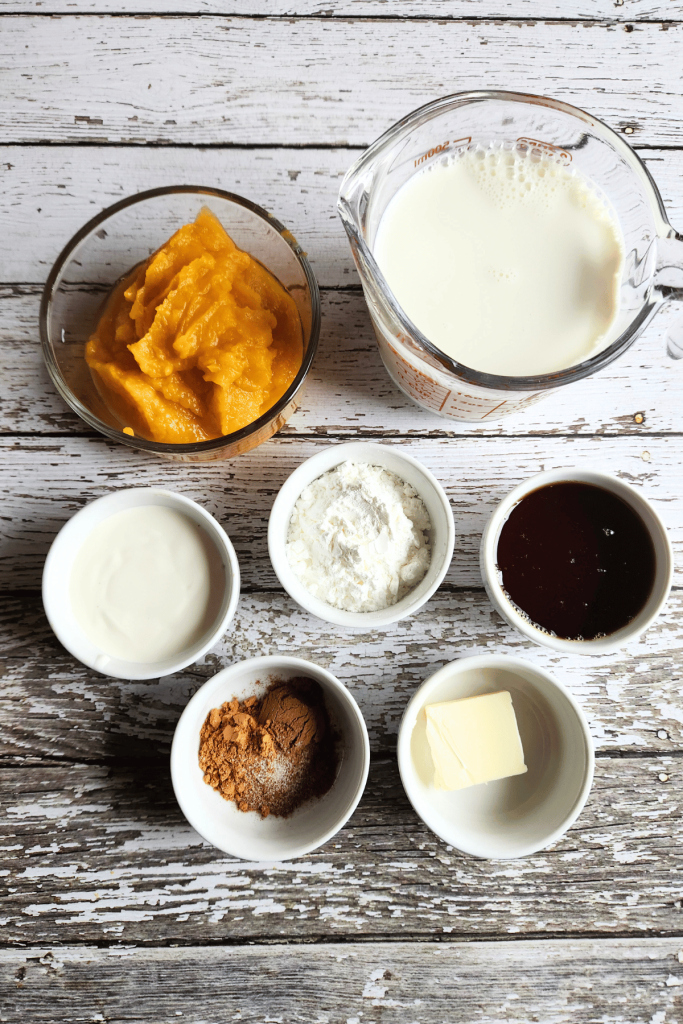
- Maple syrup: I love this organic maple syrup from Azure Standard. It has a great, rich flavor, perfect for sweetening these pudding cups.
- Cornstarch: I prefer to use organic cornstarch whenever possible, but you can use any cornstarch in your pantry.
- Milk: I use organic whole milk. If your grocery store doesn’t carry organic, conventional whole milk will certainly work!
- Pumpkin puree: Use either canned pumpkin or make your own pumpkin puree. I used frozen pumpkin puree that I thawed in the fridge overnight.
- Spices: I use my homemade pumpkin pie spice, a little extra cinnamon, and salt.
- Heavy cream: Without eggs, a good quality heavy cream goes a long way to making this great recipe smooth and silky. Use organic heavy cream if you can.
- Butter: You’ll need one tablespoon of softened butter. Azure Standard grass-fed butter is my absolute favorite, and it has the butteriest butter flavor I have ever had!
- Vanilla extract: I always have a jar of homemade vanilla extract exactly for reasons like this. I make mine with the most simple ingredients, and the homemade vanilla flavor really takes it up a notch.
How to Make Pumpkin Pudding Cups
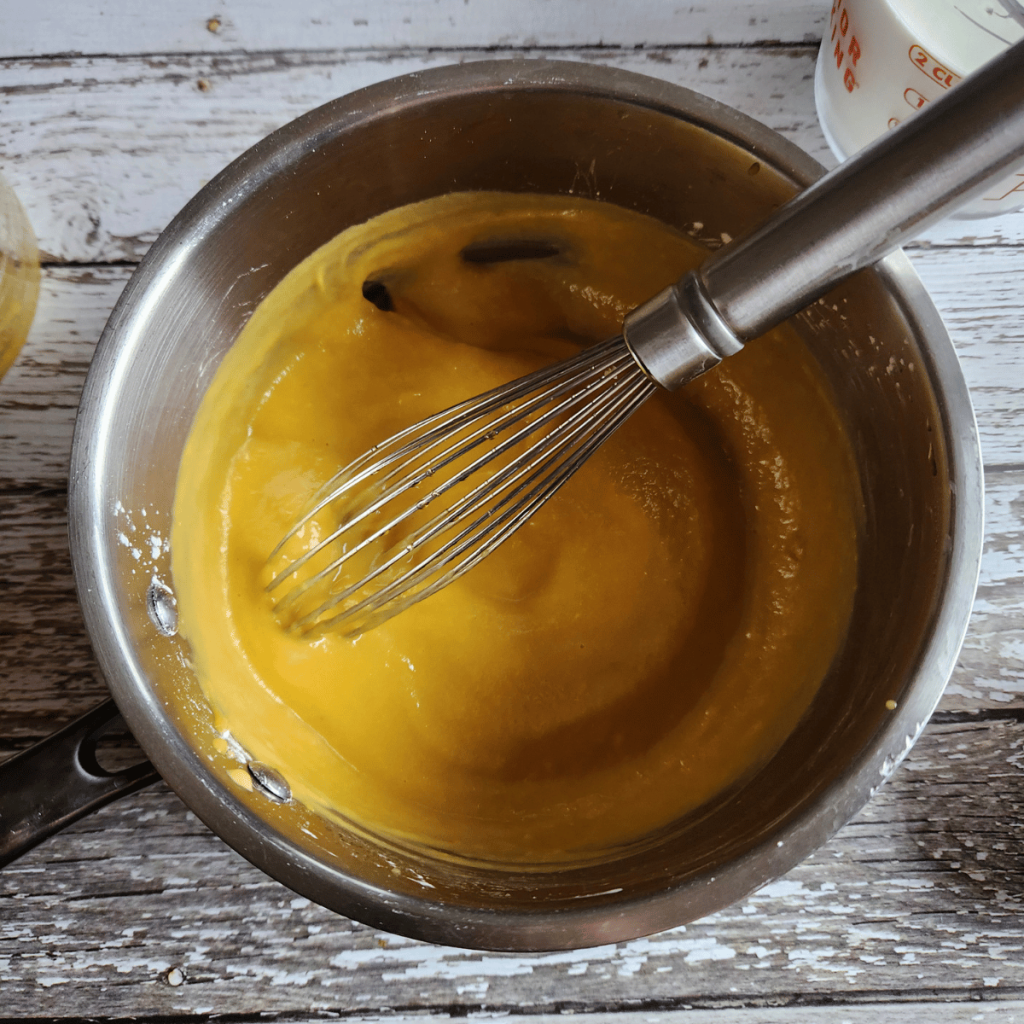
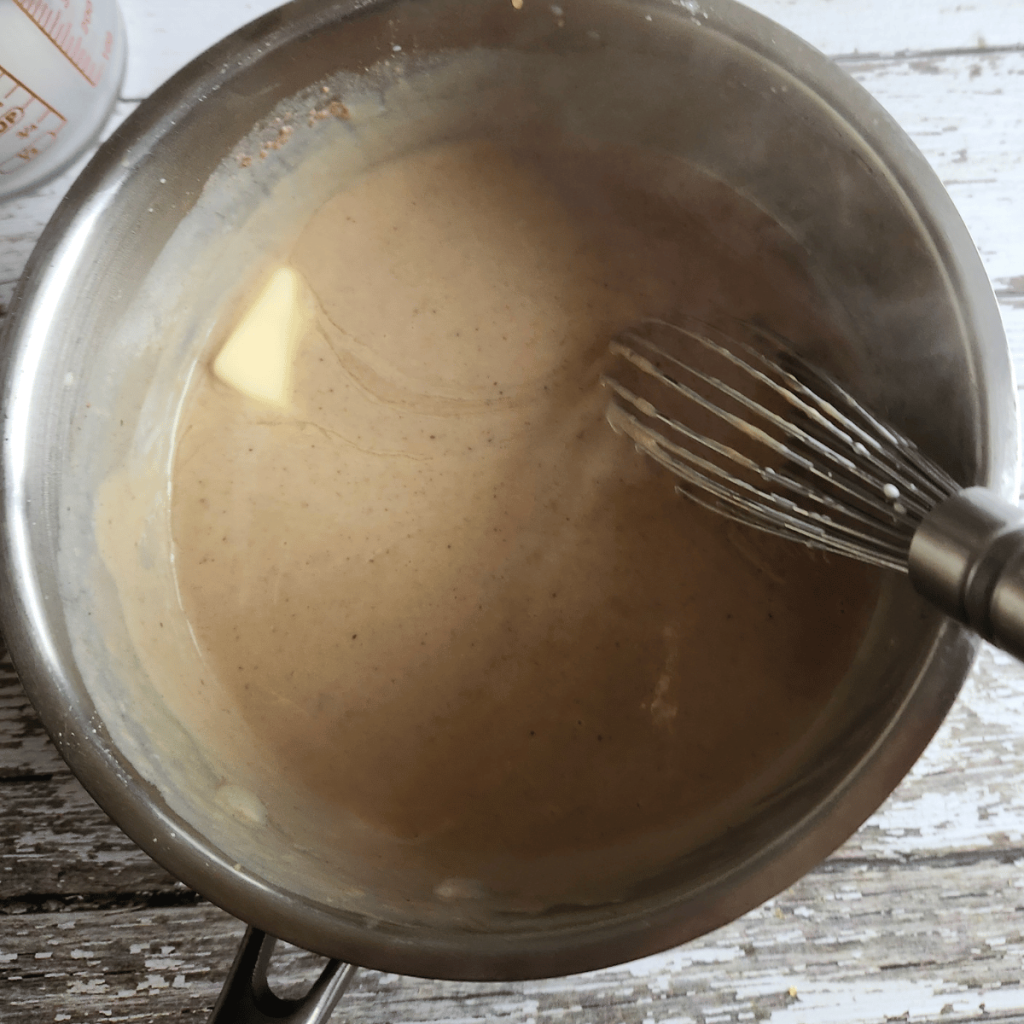
- In a medium saucepan, off the heat, add in your maple syrup, pumpkin, and cornstarch, and whisk everything together.
- Turn on the pan to medium heat and whisk a few times until the clumps disintegrate. This should happen pretty quickly once the syrup heats up!
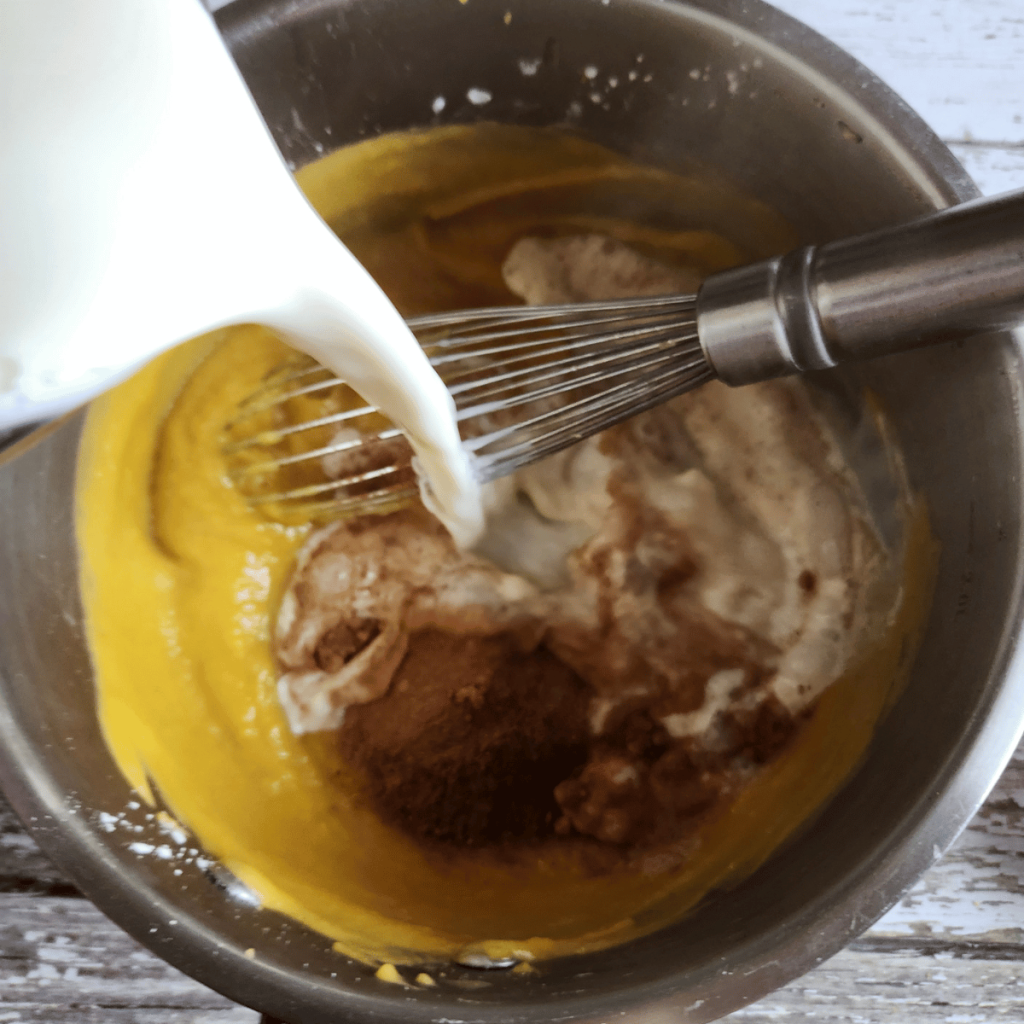
- Add your spices, milk, and salt. The mixture will look really wet at this time, and you may feel like it won’t come together. It will; don’t worry! Be sure to whisk often.
- Run a spatula along the inside edge of the pan to make sure you don’t get big clumps of pudding. Do this occasionally throughout the process.
- Let the pudding mix heat up. Whisk occasionally. It will start to thicken up gradually.
- Taste the pudding at this time. If you like desserts a little sweeter, consider adding another tablespoon of maple syrup. The flavors will mellow and come together as it rests, too.
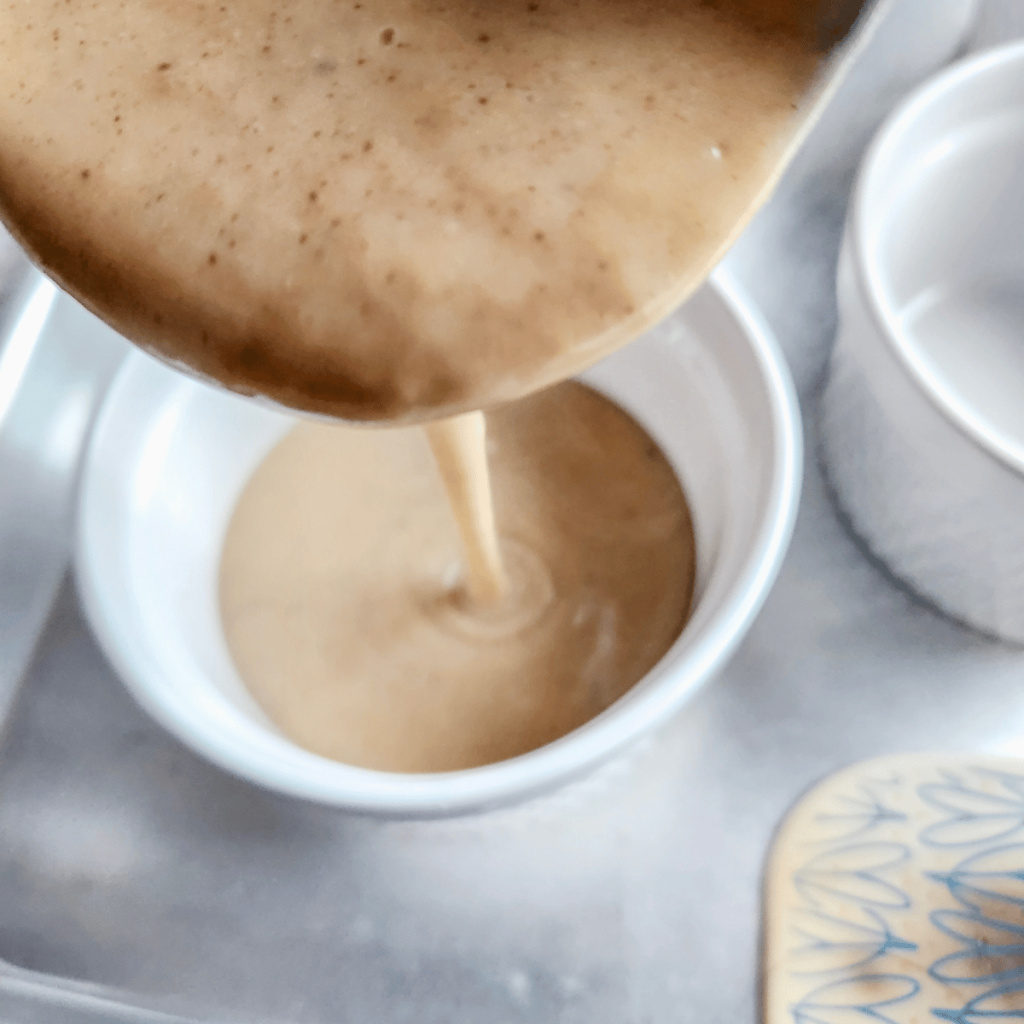
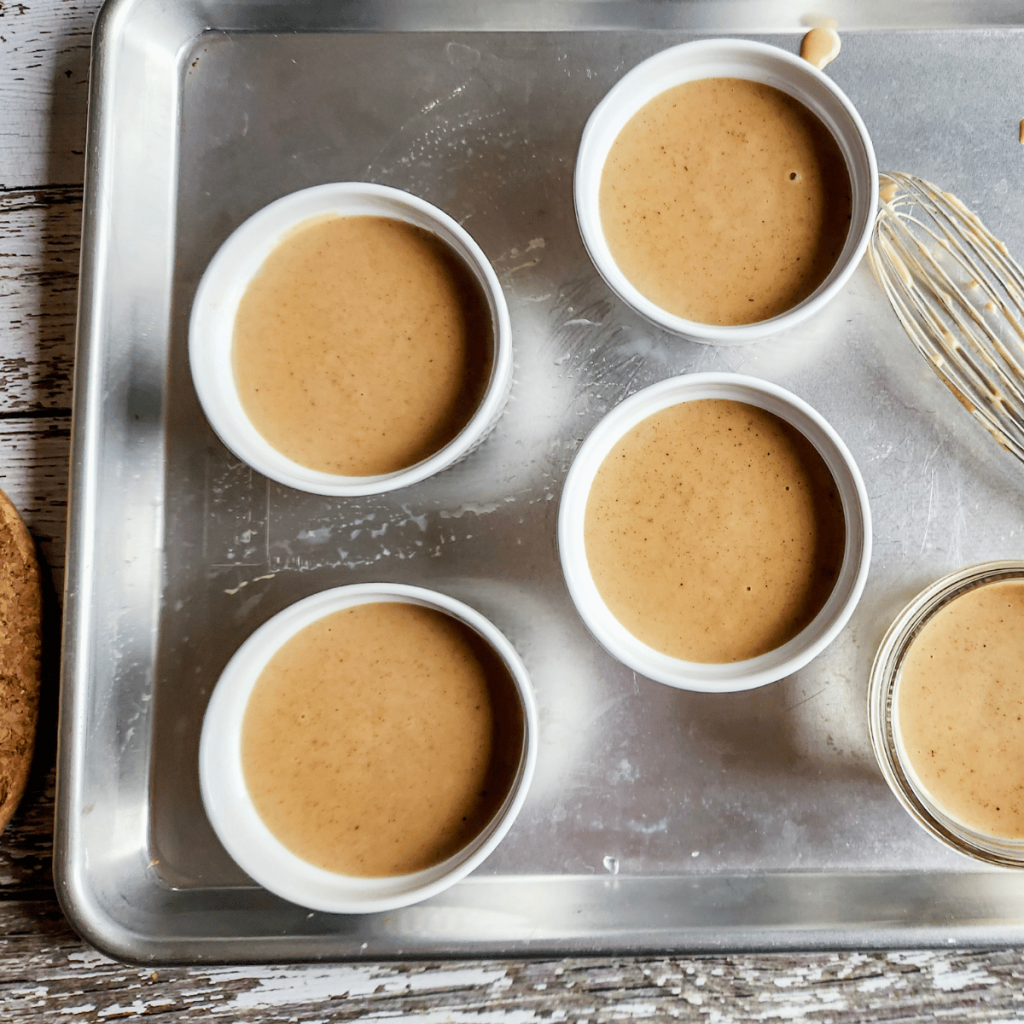
- Once you have big thick bubbles, remove the pudding from the heat. Stir in the heavy cream, butter, and vanilla. Whisk smooth and pour into your containers.
- Allow the pudding cups to chill for 2 hours or so.
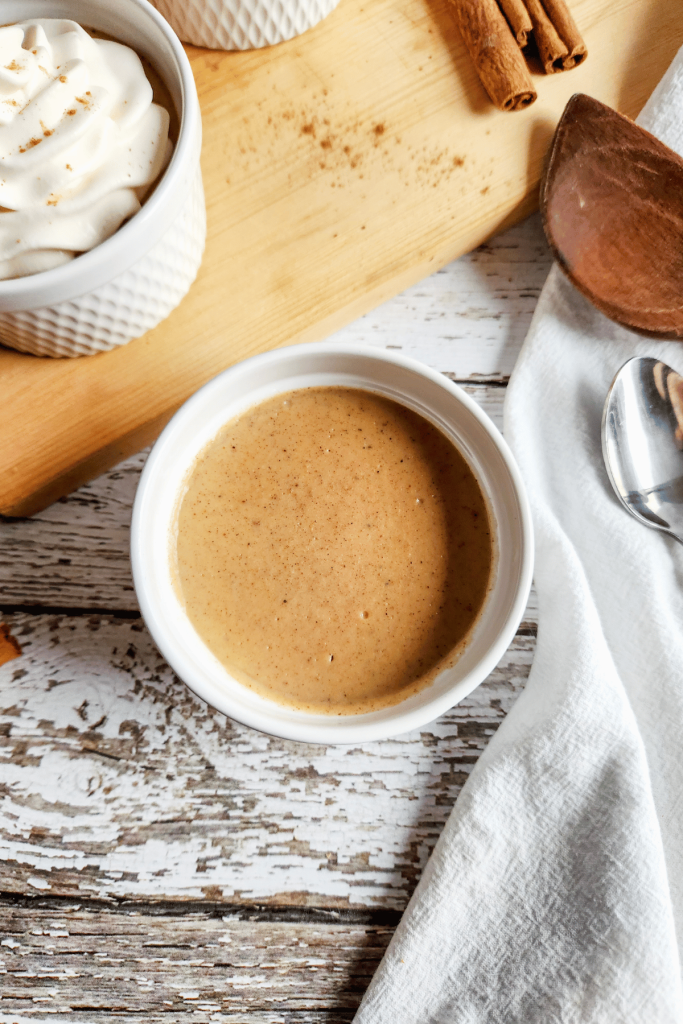
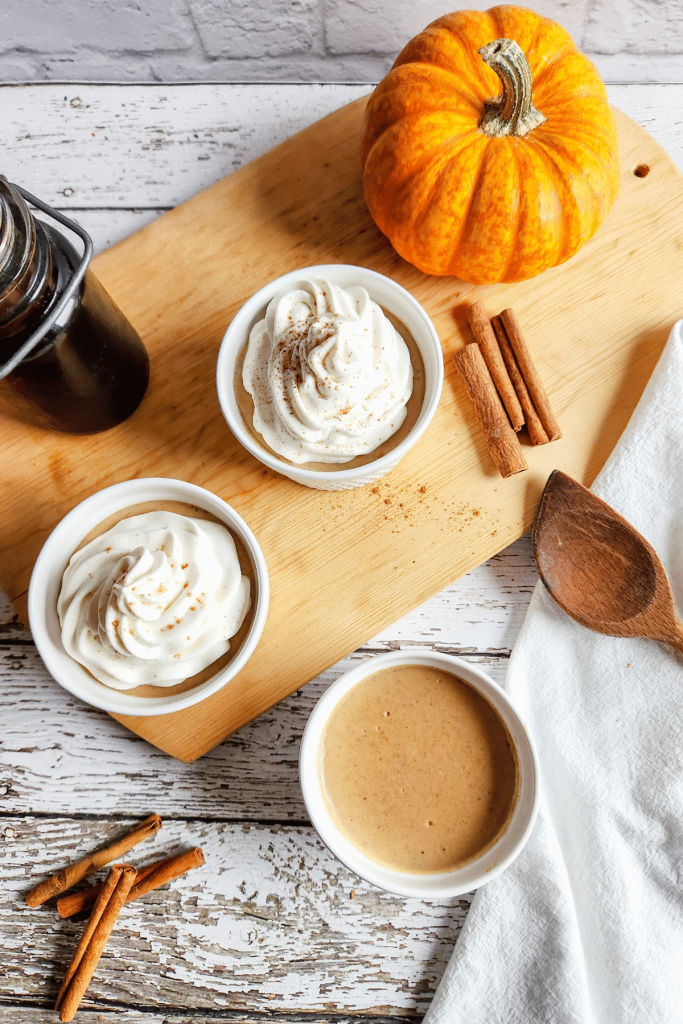
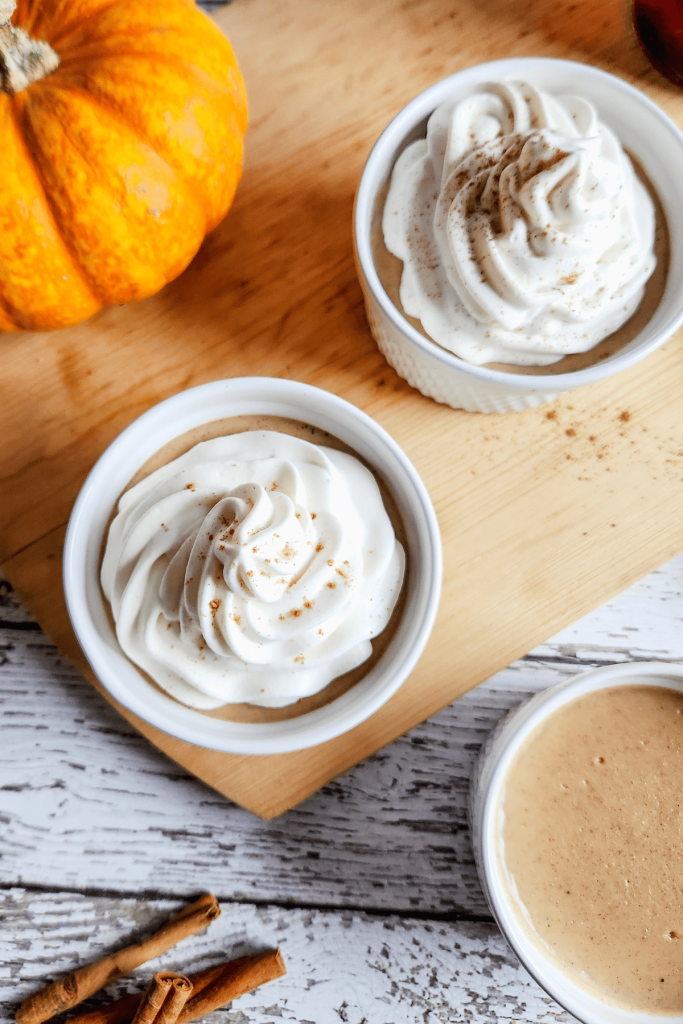
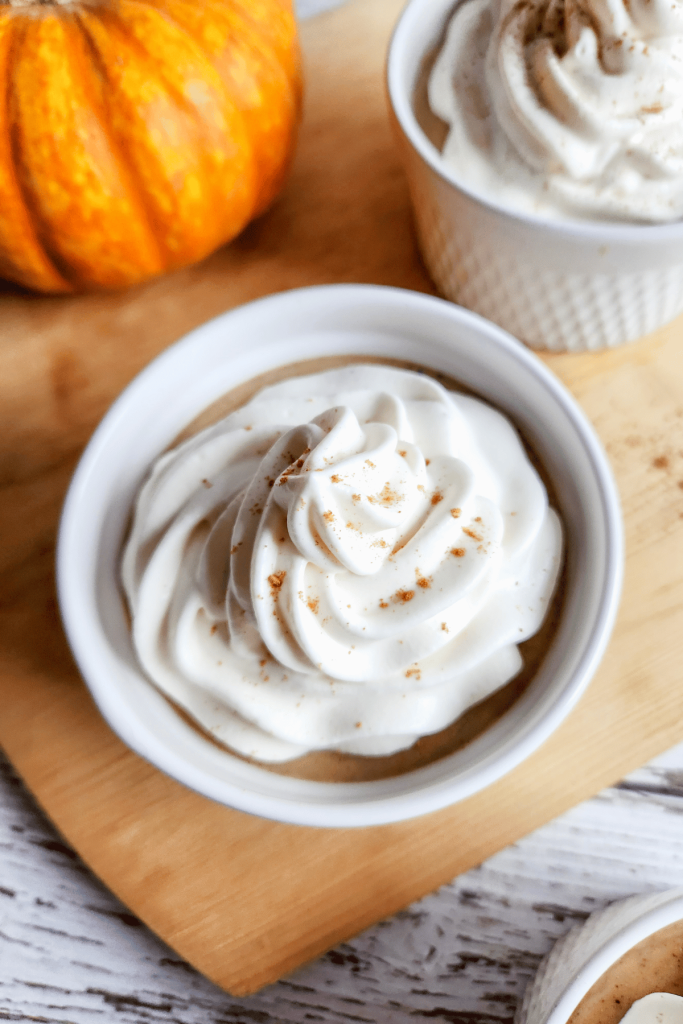
- Top with whipped cream and a sprinkle of crushed graham crackers or maple granola.
Storing
Fridge: Allow the pumpkin pudding to chill for 2 hours; until the pudding sets up. They will last for about a week in the fridge.
Freezer: For pumpkin pie pudding cups, pour the pudding mixture into popsicle molds and freeze solid. Remove from the molds and wrap in parchment paper, then store in an airtight container or bag for 1-2 months.

🍂🍪 Want more cozy fall recipes?
My brand new recipe ebook, The Cozy Season Bakebook, has 20 seasonal bakes that taste like a love letter to fall!
You can expect all the most iconic fall flavors, like cinnamon apple, pumpkin spice, maple, pecans, and more.
It’s also intentionally low-tech and beginner-friendly, so anyone can bake along!
Serving Suggestions
The convenience of this recipe makes it a natural fit for a special occasion!
- Prepare a batch ahead of time, let it cool, and it’ll be a just-right treat for after dinner.
- Pop them in the freezer for a bit for an extra cold and creamy treat. Have you ever tried frozen pudding? So refreshing!
- Serve them with a dollop of maple whipped cream and crumbled graham crackers or granola for a little crunch.
These are truly a crowd-pleaser, and because they’re such a simple recipe, even the kids can help you make them!
Pumpkin pie pudding cups are perfect for any fall occasion, including Thanksgiving, Christmas, and holiday parties. Want some more fall flavor in your life? Check out these 70 Cozy Fall Desserts to Make From Scratch!
Tips & Variations
- Do you know that skin that forms on top of pudding? Some people don’t like it, so they add plastic wrap directly on the surface of the pudding mixture to prevent it. I hear you can also add a little butter on top of your still-hot pudding and let it create a barrier. This pudding layer still tastes delicious, so I prefer to eat it!
- Want to doll up your pudding shots a bit? Add some maple whipped cream on top or sprinkle on some graham cracker crumbs or crumbled gingersnap cookies to give it that pie crust crunch! Pro tip: cinnamon graham crackers will add even more of that warm, cozy fall flavor.
- Feel free to go wild with the spices you use in this recipe! Add some nutmeg, extra ginger, allspice, or any of those classic warming spices to your taste.
- Instead of maple syrup, you can also use regular sugar or coconut sugar. Just be sure to taste the mixture and adjust the sweetness to your preference.
FAQs
Absolutely! You’ll want to use non-dairy milks. I recommend using coconut milk as it will have the perfect creamy consistency, and coconut cream is a great replacement for heavy cream. Use your favorite plant-based butter instead of dairy butter. I’ve made this pudding recipe to be creamy without needing an egg mixture, so you’re all set on that front!
To fully set up, these pudding cups should be refrigerated for two hours. If you decide to eat them warm or frozen, they will still be delicious. However, because we are creating a homemade pudding from scratch, plan on preparing this recipe a bit ahead of time to get a true pudding experience.
Cornstarch is one of the best ways to make pudding! It gels quickly, but it’s important to add the right balance of creamy ingredients; otherwise, it can have a gloopy texture. Be sure to follow your pumpkin pudding recipe closely and whisk constantly to avoid clumps!
More Fall Baking Recipes
If you love delicious dessert recipes that make you feel warm and cozy, check out some of my other latest recipes!
- Moist Pumpkin Bread with Cream Cheese Frosting
- Butterscotch Pudding Pie
- Pumpkin Pie Crumble
- Simple Apple Cider Scones
- Perfect Gravenstein Apple Crisp Recipe
- Oatmeal Cookie Pie Crust
Pumpkin Pie Pudding Cups
Equipment
- Saucepan
- Spatula
- Ramekins, jars, or mugs
Ingredients
- 1/3 cup maple syrup
- 1/4 cup cornstarch
- 1 cup pumpkin puree, or canned pumpkin
- 2 tsp pumpkin pie spice
- 1/2 tsp ground cinnamon, (optional)
- 1 pinch kosher salt
- 2 1/2 cups whole milk
- 1/4 cup heavy cream
- 1 tbs butter
- 1 tsp vanilla extract
- 1 batch maple whipped cream
Instructions
- In a medium-sized saucepan off the heat, add your maple syrup, pumpkin puree, and cornstarch to a pan. Whisk until incorporated. It may look clumpy right now.1/3 cup maple syrup, 1/4 cup cornstarch, 1 cup pumpkin puree
- Turn on the pan to medium heat and whisk a few times until the clumps disintegrate and the mixture warms up.
- Add your spices, milk, and salt to the pan. Whisk constantly. The mixture will look really wet at this time and you may feel like it won't come together. It will; don't worry!2 tsp pumpkin pie spice, 2 1/2 cups whole milk, 1 pinch kosher salt
- Run a spatula along the inside edge of the pan to make sure you don't get big clumps of pudding. Do this occasionally throughout the process.
- Let the pudding mix cook and thicken. Whisk constantly to avoid clumps of cornstarch.
- Taste the pudding. Add more syrup if you prefer sweeter desserts.
- Once you have big thick bubbles, remove the pudding from the heat. Stir in the heavy cream, butter, and vanilla. Whisk smooth and pour into your containers.1/4 cup heavy cream, 1 tbs butter, 1 tsp vanilla extract
- Allow the pudding cups to chill in the fridge for at least 2 hours (or enjoy warm).
- Top with mapled whipped cream and a sprinkle of cinnamon. Enjoy!1 batch maple whipped cream, 1/2 tsp ground cinnamon


This looks delicious, Rachael! Saw your post on The Homestead Blog Hop!
Both sounds wonderful…pumpkin and maple.
Thanks so much! We really like it with maple!
Oh goodness, I have never heard of pumpkin pudding but this looks absolutely delicious!! The flavors in the ingredients just scream FALL!
Yes, Elena! It’s really tasty and because there’s so much pumpkin, it’s lower calorie than if you made pudding just with milk. Really simple and tasty. Hope you enjoy! 🙂
Rachael, I love this recipe! Absolutely beautiful! Thank you for sharing at the TFT party! I’m featuring you this week at the party! Pinnedand shared! Happy Thursday!
Theresa
Amazing! Thank you so much! 🙂
Oh my gracious, this sounds amazing! I’m printing this out so I remember to make it. Thanks for sharing it with us at the Homestead Blog Hop, please come back again soon!
Thanks so much for visiting! We really love these pudding cups and hope you enjoy them, too. We’ll be sure to keep coming back!
Absolutely delicious – the perfect dessert for fall!
Thank you so much, Alexandra! I’m glad you liked it!
These are so cute, what a great fall treat.
Looks delicious!
These look perfect for the pumpkin lovers – I can’t wait to make these for my daughter!
Can’t wait to try this recipe! Pumpkin pie without baking….. my kinda dessert!
Fabulous recipe, 1/2 tsp ginger was just right for me!
i love that these are individual sized desserts. makes it perfect for gatherings or portion control! 😉
Yes! And since there’s so much pumpkin in them, they’re really not as high calorie as other homemade puddings!
What a delicious pudding! I am always looking for ways to use pumpkin and this pudding is a definite keeper!
It looks delicious. I wish this were in front of me right now.
Just in time for the October pumpkin spice celebrations! Thank you for bringing them to Fiesta Friday.
Absolutely! Thanks for visiting!
Such a festive recipe! I love the enthusiasm throughout the directions. Really makes me exicted as I go along.
Tyanne, I’m so glad you enjoyed this recipe!
Those pumpkin pie pudding cups turned out perfectly! My family loved it! Thank you!
Nora, I’m so glad you liked these! Thanks for trying them!