This post may contains affiliate links. We may earn a commission, at no additional cost to you, if you make a purchase via our links. See our disclosure for more information.
Lemon balm is a prolific perennial plant with a delicate lemon scent, and it couldn’t be easier to preserve to enjoy any time of the year. I’m sharing my favorite tips to help you learn how to dry lemon balm the right away so you can maximize your harvest and take care of your plant for years to come!
Lemon balm (Melissa officinalis) was the first herb I added to my garden.
I bought a lemon balm plant from a local nursery, put it in a pot (as a member of the mint family, I knew it would spread), and have somehow kept it alive for about a decade, despite ignoring it for most of that time.
That’s part of the beauty of gardening. It’s not all on you! You’re creating a space for the plant to live and thrive on its own. Add some rain and a little sunshine, and you’ll have a happy lemon balm bush for years.
It took a while, but our plant has truly become prolific this year. What a good problem to have, right?
Chances are that if you have lemon balm in your herb garden, you’re in a similar situation. You have a massive plant with tons of leaves and you aren’t quite sure what to do with it all.
The very first thing to do? Dry some. Drying lemon balm is incredibly simple, makes it easy to enjoy its calming effects any time of year, and makes the best herbal tea. You can dry it lots of different ways and it’s one of the easiest herbs to preserve ever!
In addition to dehydrating it, you can also use your fresh lemon balm to make an herbaceous Lemon Balm Pesto or the most refreshing Lemon Balm Lemonade!

Why you should dry your homegrown lemon balm
- Preserve the harvest – Once the temperatures drop, your lemon balm will go dormant for the winter. Make the most of your abundance by drying your fresh herbs for later. They’ll taste like pure summer sunshine every time you use them!
- Make your own teas and infusions – Dried lemon balm can be used to make a wonderful tea, infused oils for balms and salves, and more. I love keeping it on hand for a relaxing cup of tea any time of year. Plus, it’ll taste much better than dried tea from the store!
- Enjoy its health benefits – I’m not a doctor, but lemon balm has been used as a natural herbal remedy for millennia. I generally enjoy it for its soothing properties. It’s very relaxing and can soothe a stressed nervous system.

Ingredients
- Fresh lemon balm leaves – It’s important to use only fresh, clean leaves. Avoid any signs of rot or mold. We want peak-of-the-freshness homegrown lemon balm.
How to Harvest Lemon Balm
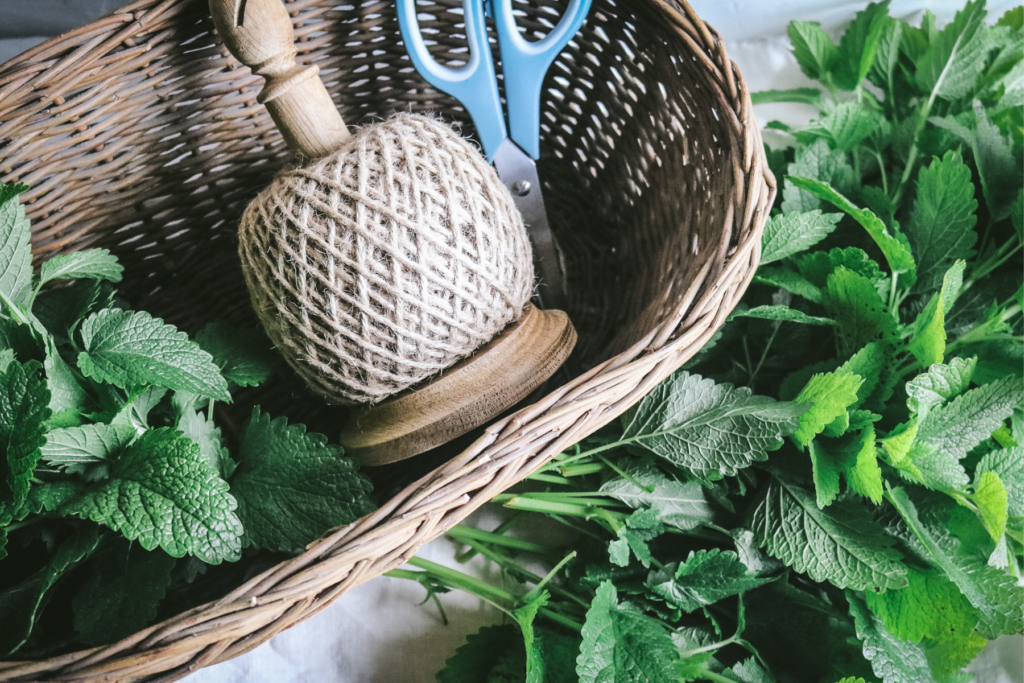
This is the best part since you get to be engulfed in that lemony scent as you harvest! I prefer to use scissors or clean shears for harvesting and generally only harvest herbs in the morning.
Although lemon balm is a perennial herb, it takes time for the root system to develop. Be careful not to harvest too much.
If you have a new plant, consider plucking small amounts of leaves with your fingers instead of harvesting a large quantity. Treating your plant carefully this year will result in a much larger harvest next year.
- Look for a clean, healthy stem.
- Trim just above a small set of leaves so that the plant can continue to grow new leaves. No need to pluck the leaves from the stems; you can strip the leaves once they’re fully dried.
- Be careful not to harvest more than a third of the plant at a time. It will continue to produce more leaves throughout the growing season, so you can cut and come again. It’s best to harvest in late spring or early summer before the plants begin to flower.
- Rinse the leaves under cool or cold water and toss in a salad spinner to remove any excess moisture.
- Let them air dry on a kitchen towel before you begin with whichever method of drying you prefer.
How to Dry Lemon Balm (3 Methods}
First, I want to tell you that there are multiple ways to dry herbs. You can bang them in the dehydrator, hang them up, pop them in the air fryer or even microwave them! But, I also want to set you up for success.
After drying lots and lots of lemon balm over the years, I will caution you against the oven method. It can work, but you must be ultra careful to reduce the heat in the oven or your delicate little leaves will turn brown and crispy. No bueno.

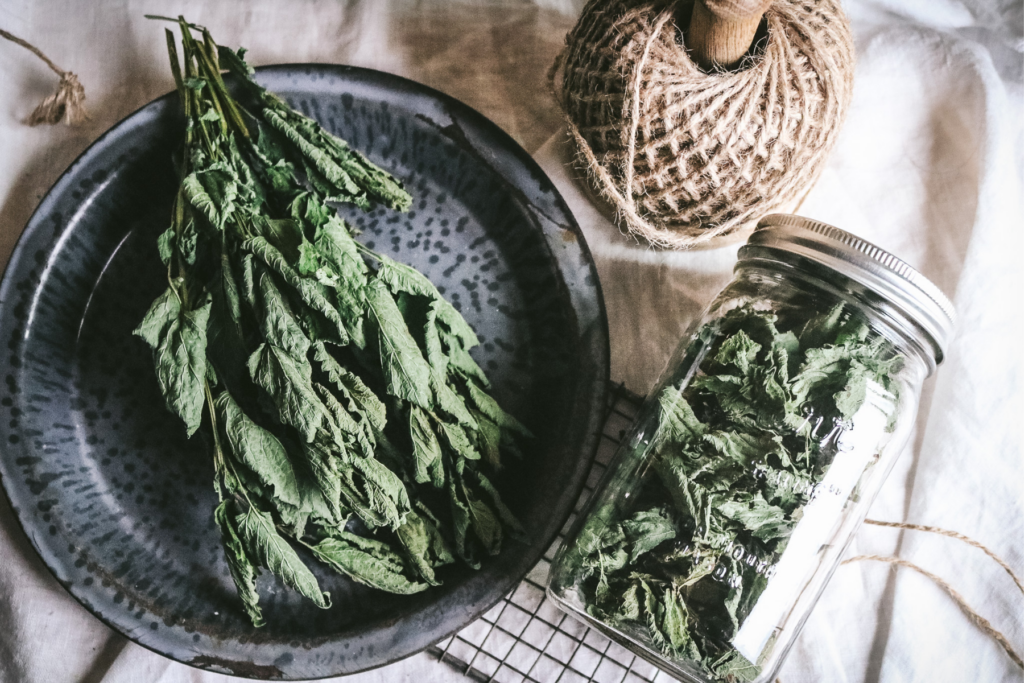
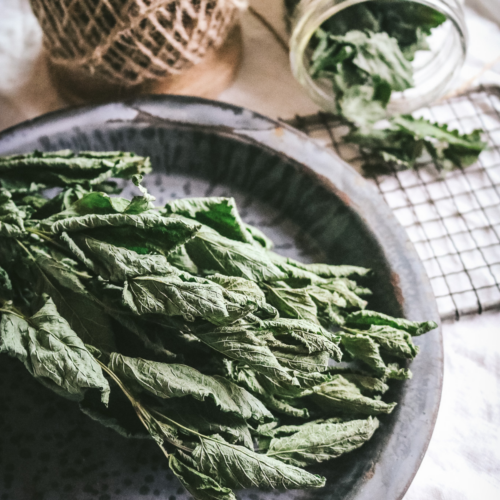
Lemon balm dries so quickly that I actually prefer to air dry it. You don’t have to hang it up with twine, either.
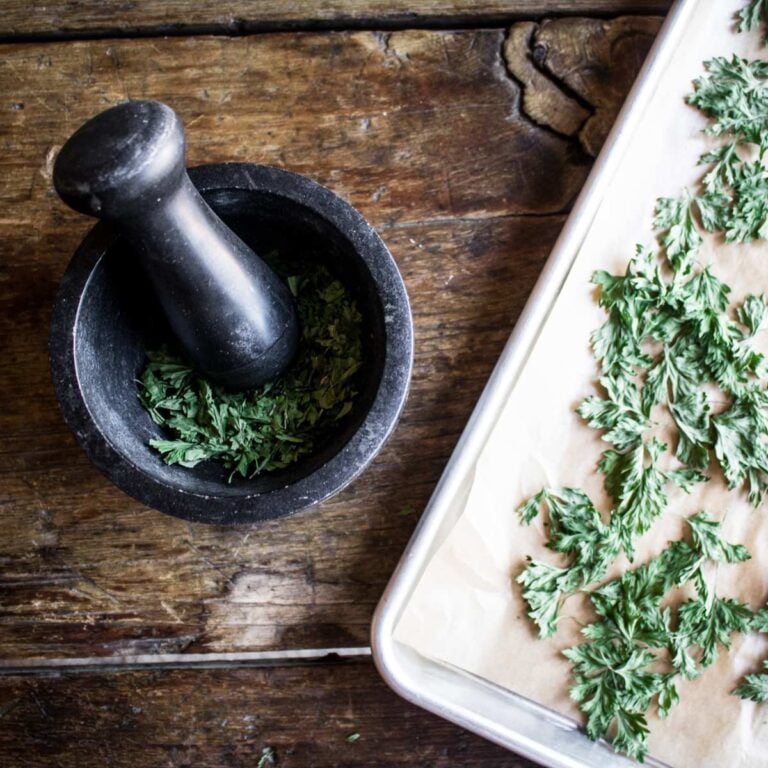
I’ve laid out the leaves on a plate before and come back a week later to perfectly dried leaves. Crisp, bright green, and full of that lemon balm scent.
Save the fuss of the dehydrator for something else (like dehydrating cherries), and let the ambient warmth of your home dry your lemon balm for you!

Air Drying
Although we usually think of hanging herbs for drying, you don’t have to! When I was taking photos for this post, I tried several different methods.
First, I hung a bunch on the wall (worked great!).
Second, I left a bunch of herbs on a paper plate (also worked great!).
Finally, I forgot I had some leaves hanging out in an open salad spinner before we went camping. I came back to perfectly dried herbs from each one.
I actually think drying them in a colander (the open salad spinner) allowed them to dry more evenly with air flow all around the leaves.
Choose whichever method works for you!
- Prepare your lemon balm for drying (tie small bunches with twine or arrange the clean lemon balm sprigs in a single layer on a large platter or sheet pan).
- If hanging, hang the bunch in a cool, dry place away from direct sunlight. If drying on a platter or sheet pan, just find a place the leaves can sit undisturbed with good circulation to avoid mold. I usually hang on a kitchen wall out of direct sunlight, which can drain the leaves of color.
- Allow the leaves to dry for 1-4 weeks or until completely dried and crumbly. Check every few days to see how the leaves are progressing. Lemon balm seems to dry faster than other herbs and is always done for me in just one week.
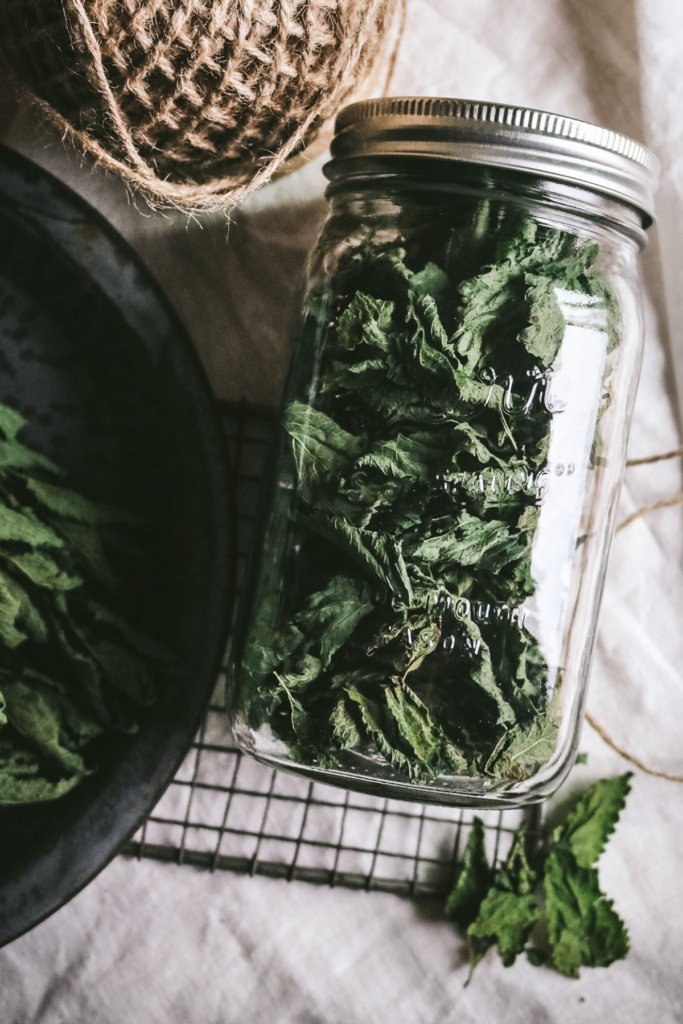
- Once fully dried, strip the dried leaves from the stems and transfer the leaves to an airtight container.
Note: Make sure the leaves are fully dried or you can spread mold throughout your jar, which will make the entire batch unusable.
Food Dehydrator
This is faster than air drying, and is the best alternative since is it very consistent and results in beautiful green leaves with a strong lemon balm scent.
- Arrange the springs in an even layer on your dehydrator trays.
- Dry at the lowest setting (95-105 F) for 12-18 hours or until the leaves are completely dry.
- Remove from the dehydrator and remove the dried leaves from the stems. Store leaves in an airtight jar or container.

Oven Method
As noted above and in the instructions, this method requires constant observation. It is very, very easy to singe your leaves, which really eliminates the scent and flavor.
I personally have lost about 3 sheet pans of lemon balm from this in the past despite trying to be careful. The oven door must be open at least halfway.
I normally dehydrate herbs in an oven by propping the door slightly, but that is still too hot for delicate lemon balm. Again, the door must be open at least halfway or your leaves will burn to a crisp.
- Preheat the oven to the lowest setting (usually 170 F).
- Place the parchment paper on a baking tray and arrange the leaves in an even layer.
- Set the pan in the oven and prop the door open halfway to reduce the temperature. This is very important. If the delicate leaves get too much heat, they will turn a dark color and lose most of their aroma/flavor.
- Let the leaves dry until crumbly (approximately 1 hour). Keep a very close eye on the leaves. I’ve scorched multiple batches in the oven despite being careful!
- Transfer to an airtight container.
Storing Suggestions
Once fully dried, the leaves can be stored in an airtight container in a cool, dark place for 1-2 years. Avoid direct sunlight, as it can reduce the quality of the dried herbs over time.
I also usually keep the leaves whole as I put them in my jar. You don’t need to be overly delicate with them, but it can be a nice way to keep those volatile oils locked inside each leaf.

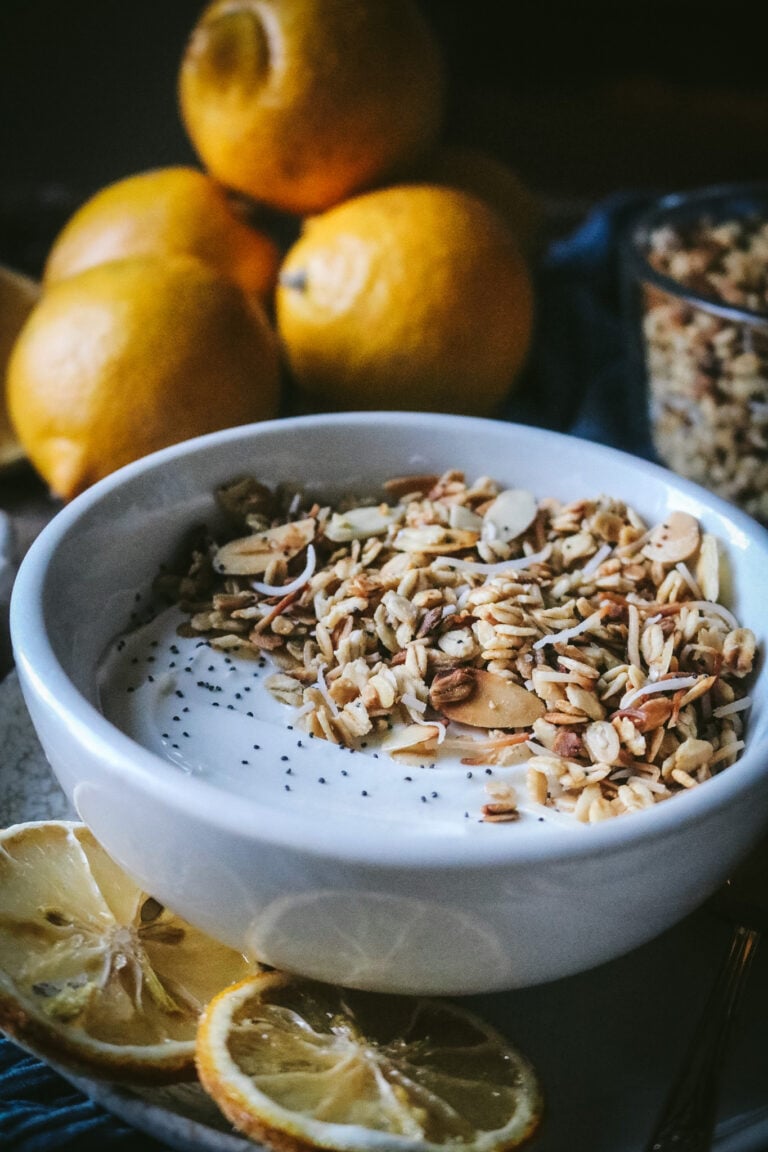
How to Use Dried Lemon Balm
The easiest way to use dried lemon balm is to make lemon balm tea, whether it’s a hot tea or a refreshing iced tea.
You can also use dried lemon balm instead of fresh for my lemon balm syrup, and add it to a variety of baking recipes.
Keep in mind that dried lemon balm won’t have nearly the same fresh flavor as fresh leaves, but you can generally use about half as much. So if a recipe calls for 1/2 cup of fresh leaves, you can get by with 1/4 of dried leaves.
FAQs
Since you’re dehydrating at such a low temperature, it typically takes 12-18 hours. Don’t worry too much on the timeline, though.
You’ll know when the leaves are done because they’ll be totally dry and crumbly. Be careful not to remove from the dehydrator too soon. Any leftover moisture can lead to mold.
Bunch size can be hard to gauge. I usually gather about 10-12 sprigs. When held together, the bunch of stems is usually about as thick as a nickel.
Tie quite tightly with the twine as the stems will shrink as they dry, which can cause the leaves to fall down. If you’re worried about that happening, you can actually place the bunch in a brown paper bag and let it dry in the bag instead.
If you have a lot to dry, it’s best to dry multiple bunches of lemon balm instead of making one huge one. Good air circulation is crucial to getting the leaves to dry quickly and reducing the likelihood of mold or rot.
Related Posts
- How to Dry Basil
- Drying Dill Leaves & Seeds
- Dehydrating Sage
- How to Dry Green Onions
- Drying Parsley from the Garden
If you made this recipe, please leave a comment or ask a question below! I’d love to hear what you think or troubleshoot any issues.
Get my FREE Homestead Kitchen Supply List to make it easier than ever to cook and bake from scratch.
Want more seasonal recipes? Subscribe for email updates or follow Milk Glass Home & Kitchen on social media. Join my Facebook Group Seasonal Slow Living to become part of the community!
How to Dry Lemon Balm
Ingredients
- fresh lemon balm leaves, as much as you'd like to dry
Instructions
Air Drying
- Prepare your lemon balm for drying (tie small bunches with twine or arrange the clean lemon balm sprigs in a single layer on a large platter or sheet pan). If hanging, hang the bunch in a cool, dry place away from direct sunlight. If drying on a platter or sheet pan, just find a place the leaves can sit undisturbed with good circulation to avoid mold. I usually hang on a kitchen wall out of direct sunlight, which can drain the leaves of color.
- Allow the leaves to dry for 1-4 weeks or until completely dried and crumbly. Check every few days to see how the leaves are progressing. Lemon balm seems to dry faster than other herbs and is always done for me in just one week.
- Once fully dried, strip the dried leaves from the stems and transfer the leaves to an airtight container.
- Note: Make sure the leaves are fully dried or you can spread mold throughout your jar, which will make the entire batch unusable.
Food Dehydrator
- Arrange the springs in an even layer on your dehydrator trays.
- Dry at the lowest setting (95-105 F) for 12-18 hours or until the leaves are completely dry.
- Remove from the dehydrator and remove the dried leaves from the stems. Store leaves in an airtight jar or container.
Oven Method
- Preheat the oven to the lowest setting (usually 170 F).
- Place the parchment paper on a baking tray and arrange the leaves in an even layer.
- Set the pan in the oven and prop the door open halfway to reduce the temperature. This is very important. If the delicate leaves get too much heat, they will turn a dark color and lose most of their aroma/flavor.
- Let the leaves dry until crumbly (approximately 1 hour). Keep a very close eye on the leaves. I’ve scorched multiple batches in the oven despite being careful!
- Transfer to an airtight container
Did you try this recipe?
Post a photo and tag @milkglasshome!Pin this recipe for later!