This post may contains affiliate links. We may earn a commission, at no additional cost to you, if you make a purchase via our links. See our disclosure for more information.
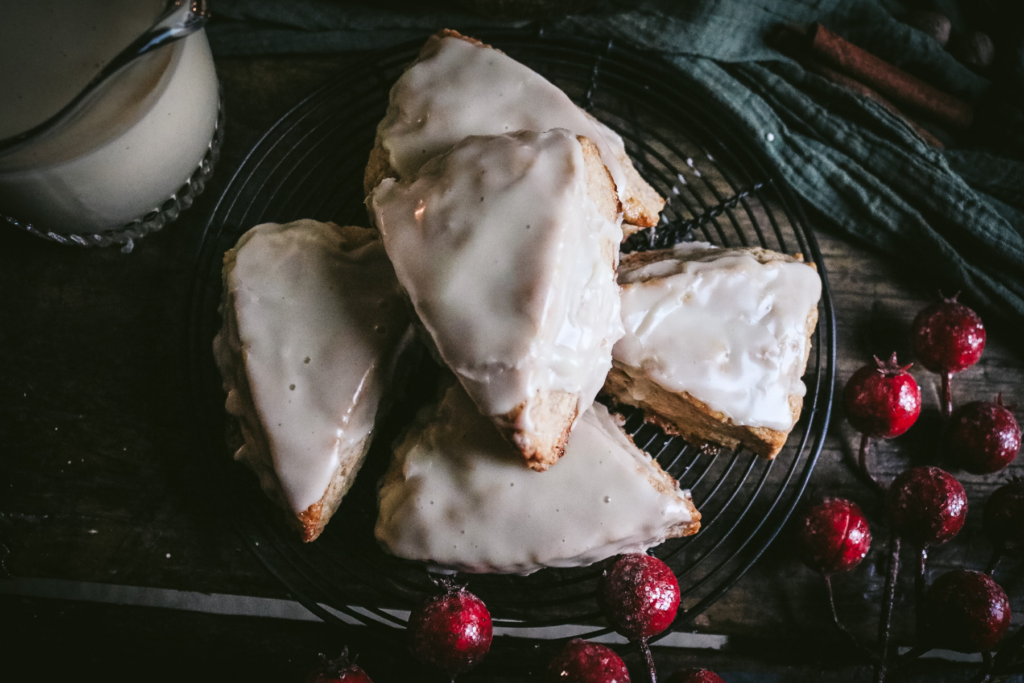
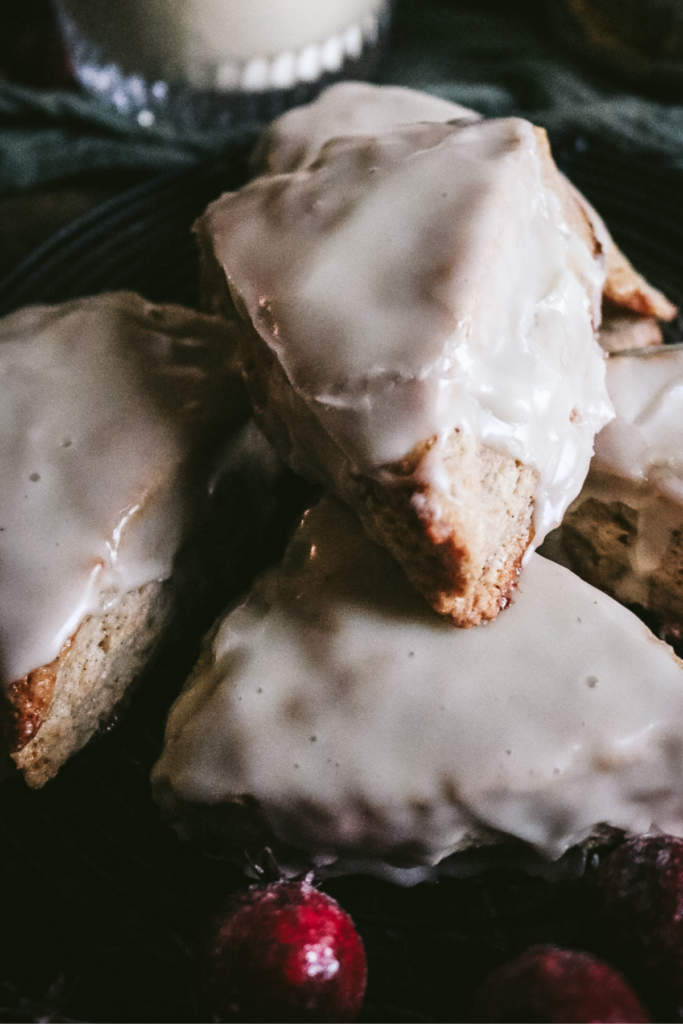
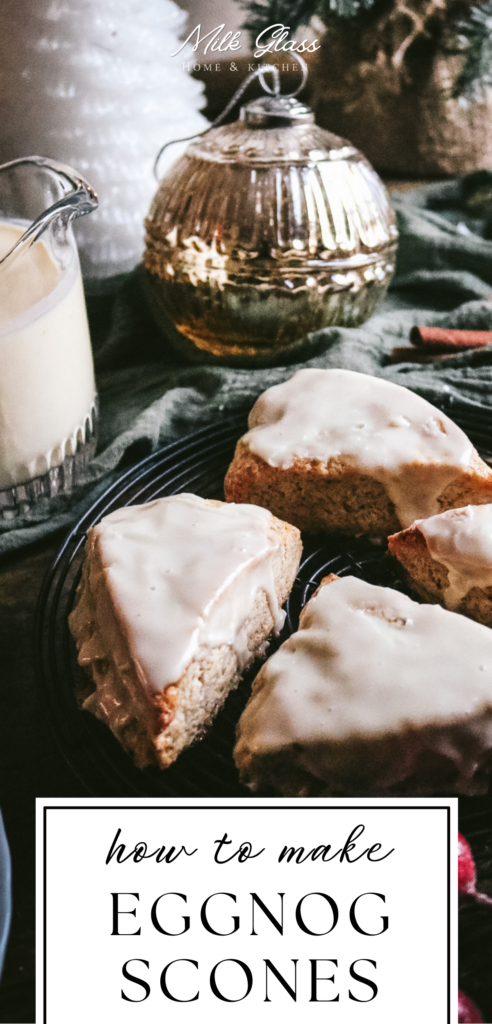
Infused with real eggnog and warm spices, these tender, flaky eggnog scones are a great option for a holiday brunch! Even better, they rely on mostly pantry staples, so you can throw them together at the last minute (or let them hang out in the fridge to bake on Christmas morning). They’re the perfect holiday treat!

I’m a scone fiend (see the rest of my scone recipes as evidence) and I grew up looking forward to eggnog season all year! It tastes like melted vanilla ice cream to me in the best way possible. Anyone else with me on that?
Since I normally add heavy cream or buttermilk to my scones, I wanted to try a version that used eggnog instead. I amped up the spices and was thrilled by how much that eggnog flavor carries through, even after baking.
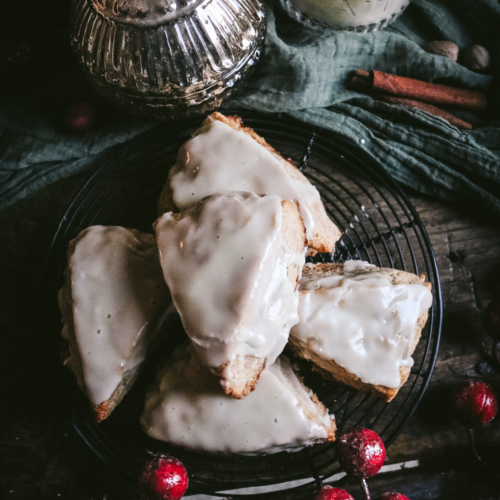
Top them off with a super simple eggnog glaze and you’ll understand why we’ve had to ban these eggnog scones from our house. They’re a little too good!
If you love scones, take a peek at these tender, melt-in-your-mouth cardamom scones or my mouth-puckering lemon white chocolate scones.
Why you’ll love this eggnog scone recipe
- Super simple to make
- Great way to use up leftover eggnog
- Classic holiday flavor
- Tender, flaky scones
- Lovely for holiday gatherings
- Made with simple ingredients
- Can be made ahead of time for easy entertaining
Ingredients
For the scone dough
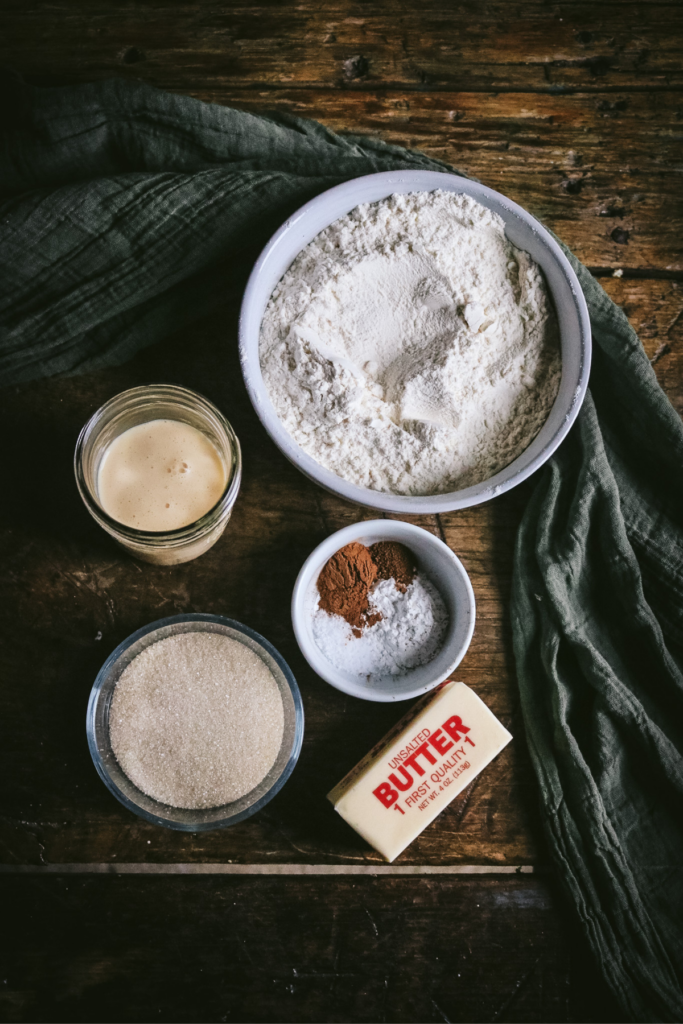
- All purpose flour – Be sure to scoop and level the measuring cup to avoid adding too much flour.
- Unsalted butter – I use very cold butter for the best, flakiest texture.
- Baking powder
- Kosher salt
- Sugar – I normally add just a small amount of sugar to my scones, but these ones are a bit more decadent. I like to use 1/3 cup sugar but feel free to use as much as 1/2 cup. Since the glaze is sweet, you don’t need too much!
- Cinnamon & nutmeg – For that classic holiday flavor.
- Eggnog – They’re not really eggnog scones without it! Feel free to use any type. We used Darigold eggnog.
For the sweet eggnog glaze
- Powdered sugar
- Eggnog
Equipment
To make this recipe, you’ll need:
- To make this scone recipe, you’ll need:
- Food processor
- Pastry brush (optional)
- Sheet pan
- Parchment paper
- Sharp knife
- Small bowl
- Whisk
How to Make Eggnog Scones
Prepare the dough
- Line a sheet pan with parchment paper.
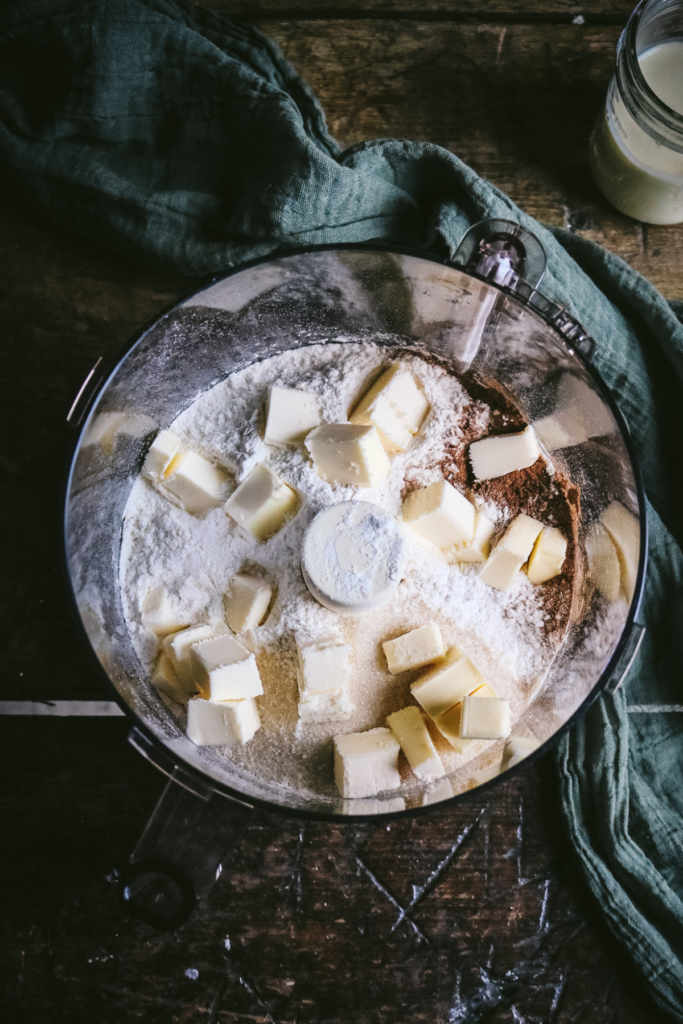
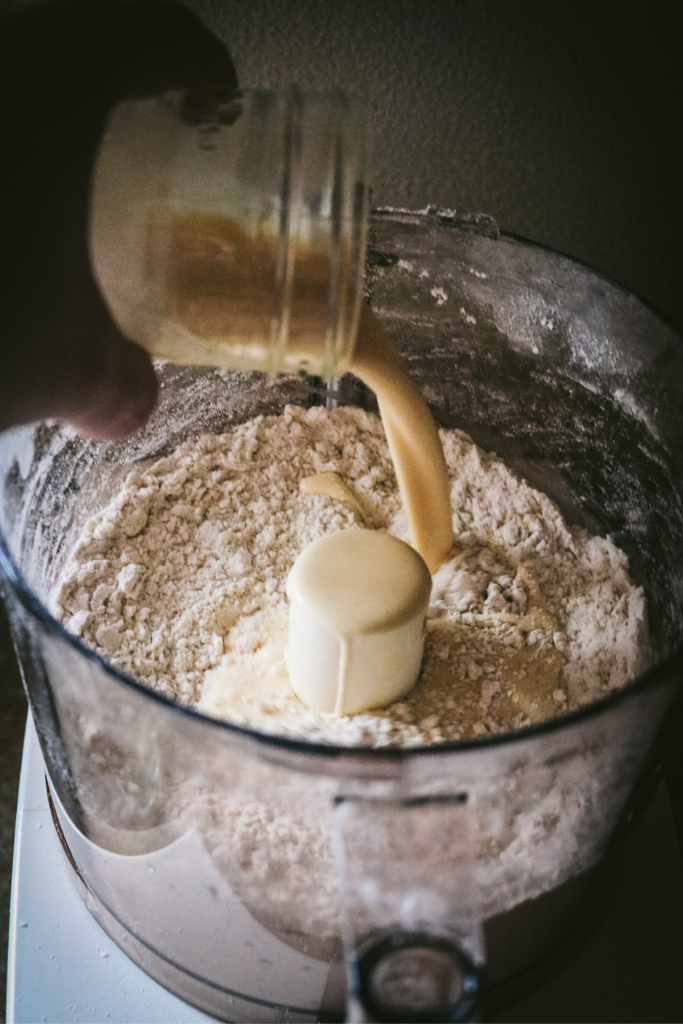
- Add the flour, salt, baking powder, sugar, spices, and cubed butter into the bowl of a food processor.
- Pulse to combine. The mixture should look sandy.
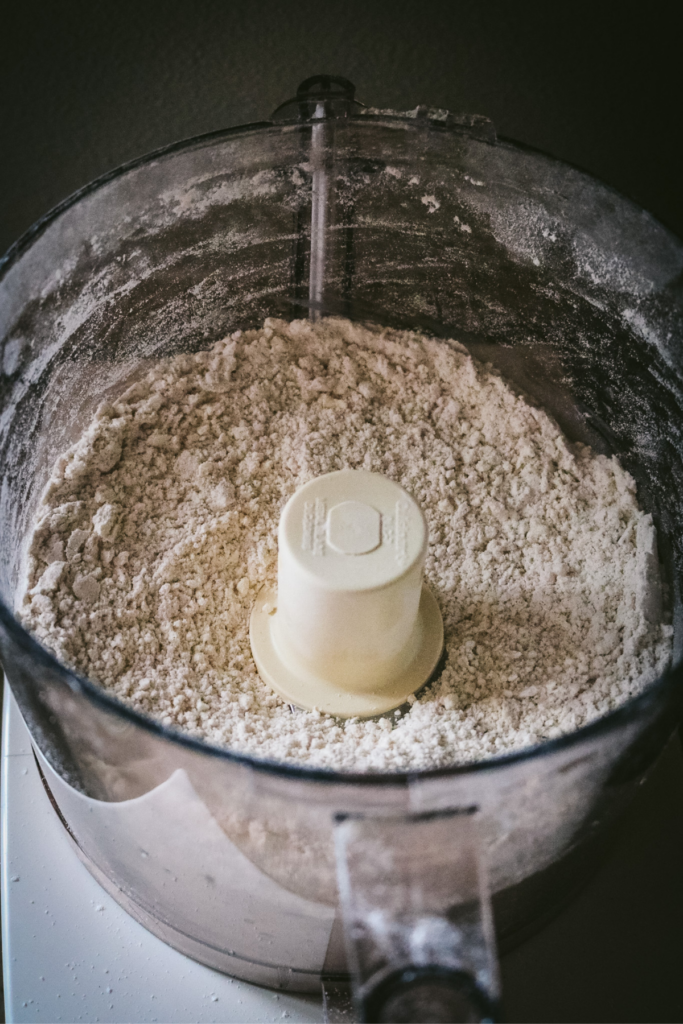
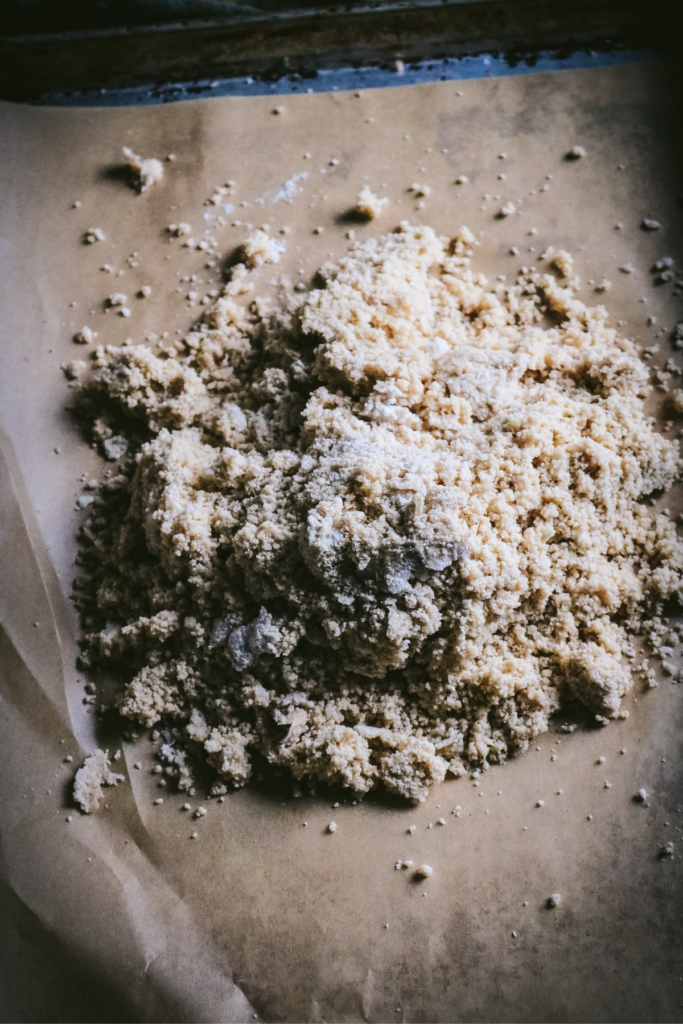
- Add the eggnog and blend for 5-10 seconds or until the mixture pulls away from the sides of the bowl and looks like coarse crumbs.
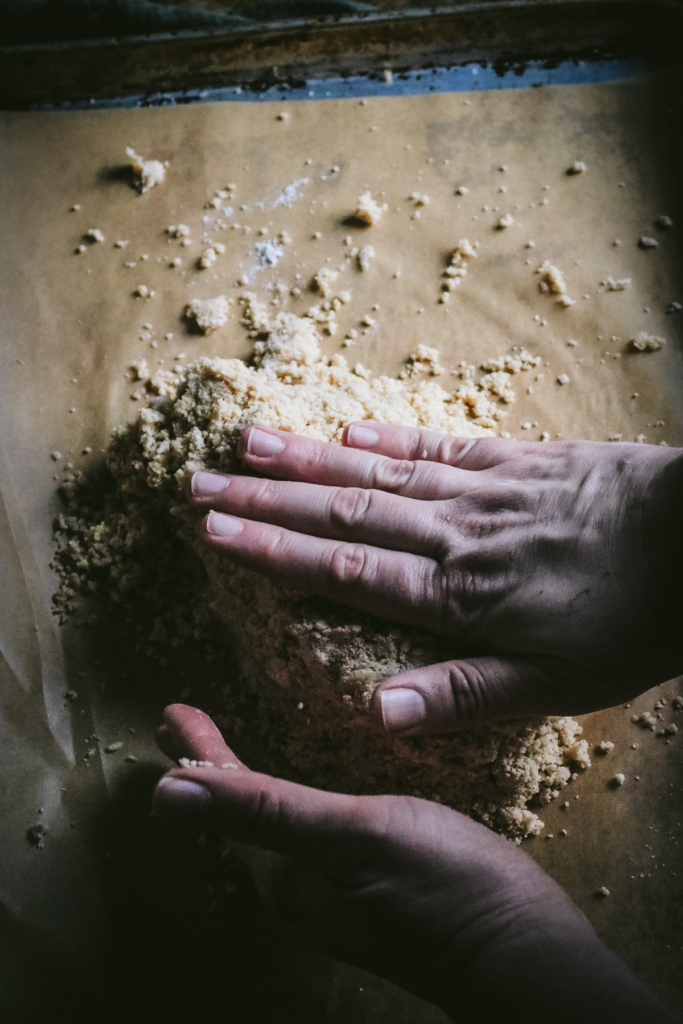
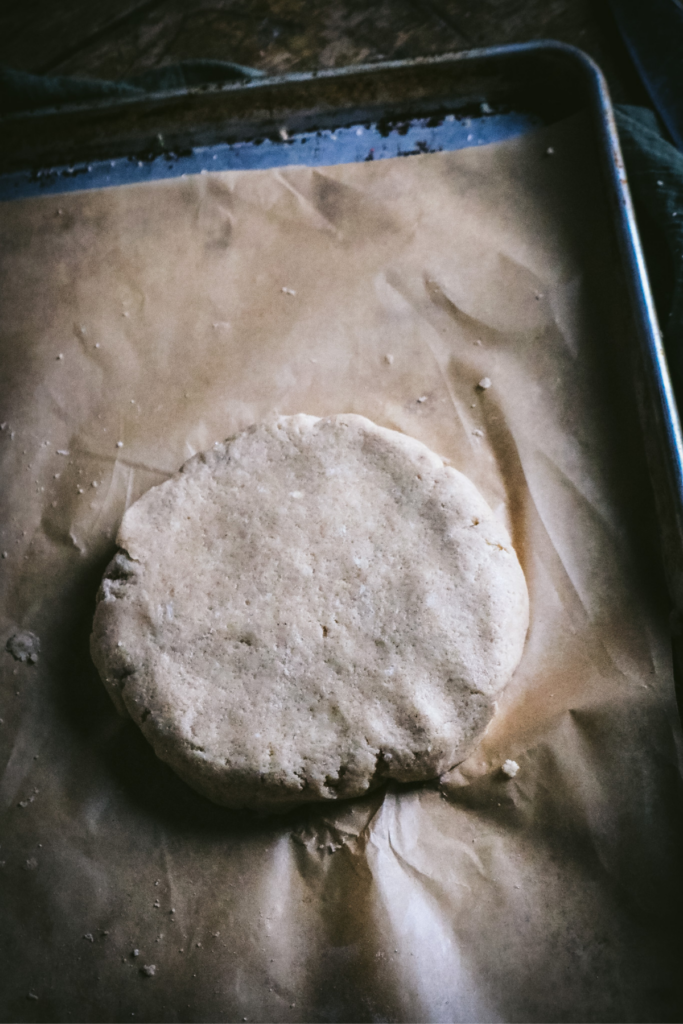
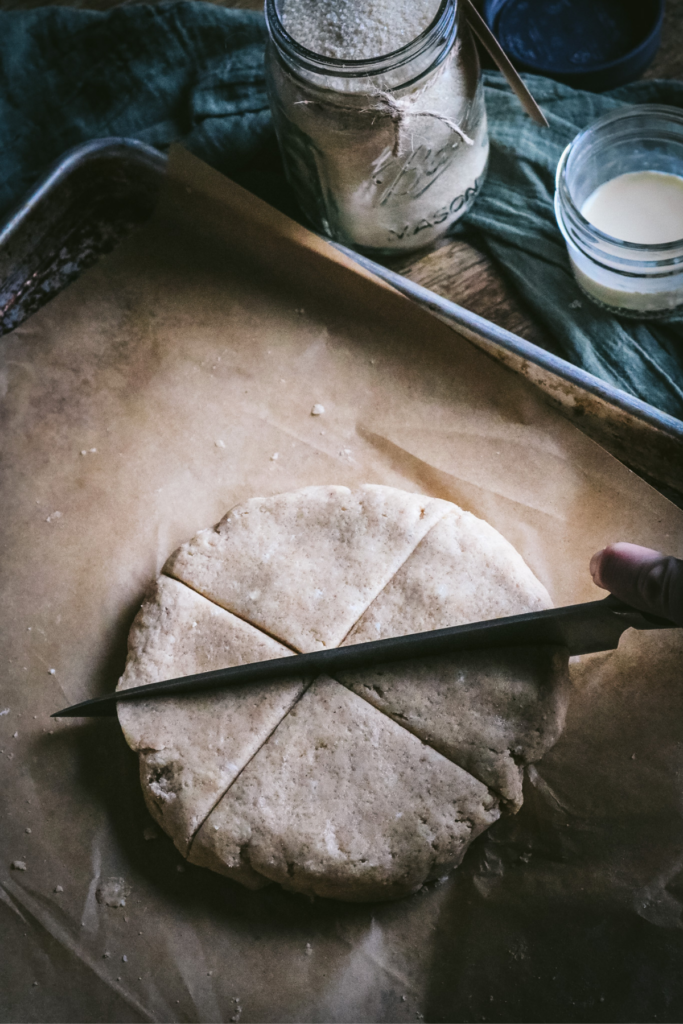
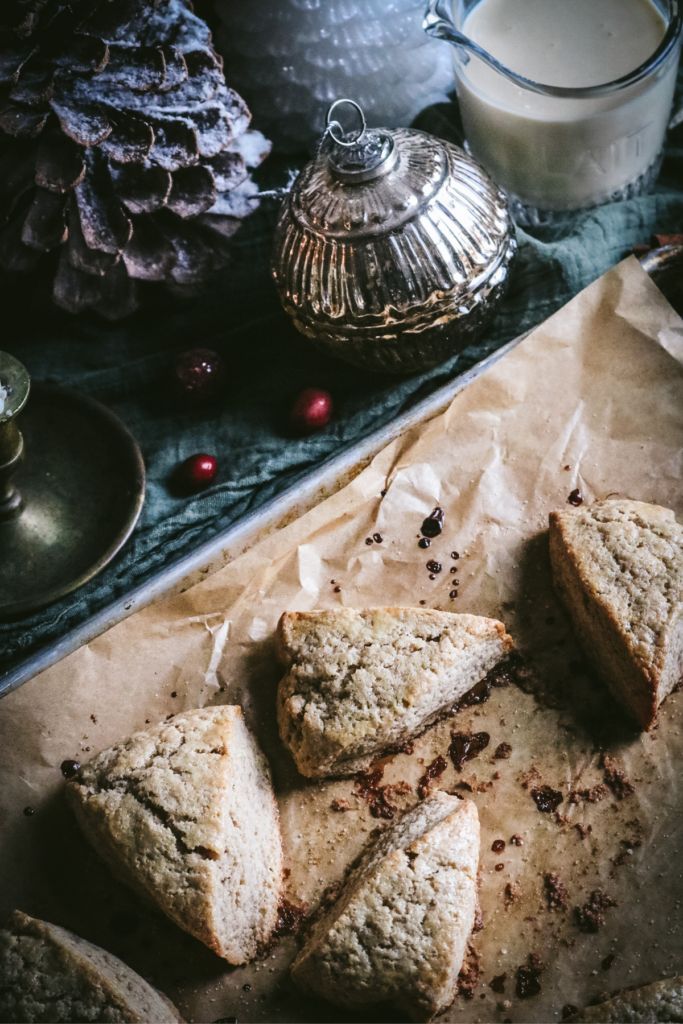
- Turn out onto the prepared baking sheet and knead gently until it comes together. Press into a 1-inch tall circle and refrigerate for at least 15-20 minutes. (Feel free to make them to this point the night before, then cover with parchment paper and refrigerate until you’re ready to bake.)
Bake the scones
- Preheat the oven to 375 F.
- Once the oven is preheated, cut the scones into wedges with a sharp knife and brush the scones with a small amount of eggnog and bake for 15-18 minutes. The bottoms and sides should be slightly golden brown.
- Allow the scones to rest on the tray and cool for at least 5-10 minutes.
Prepare and glaze
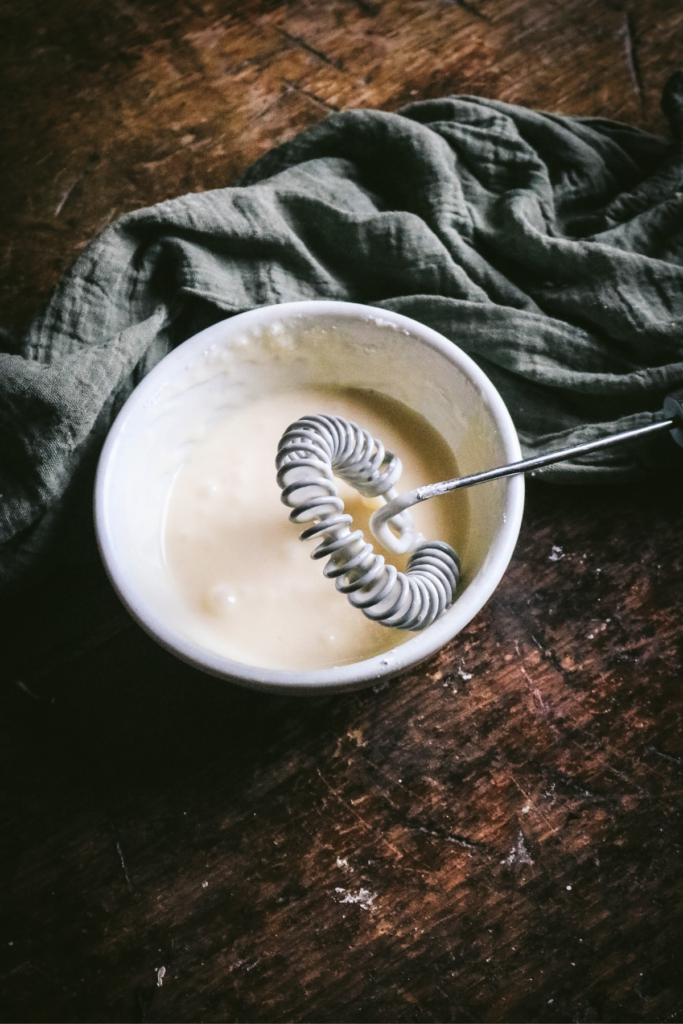
- While cooling the scones, whisk together the powdered sugar and eggnog. Tip: Start with half as much powdered sugar, whisk it in, then add the rest.
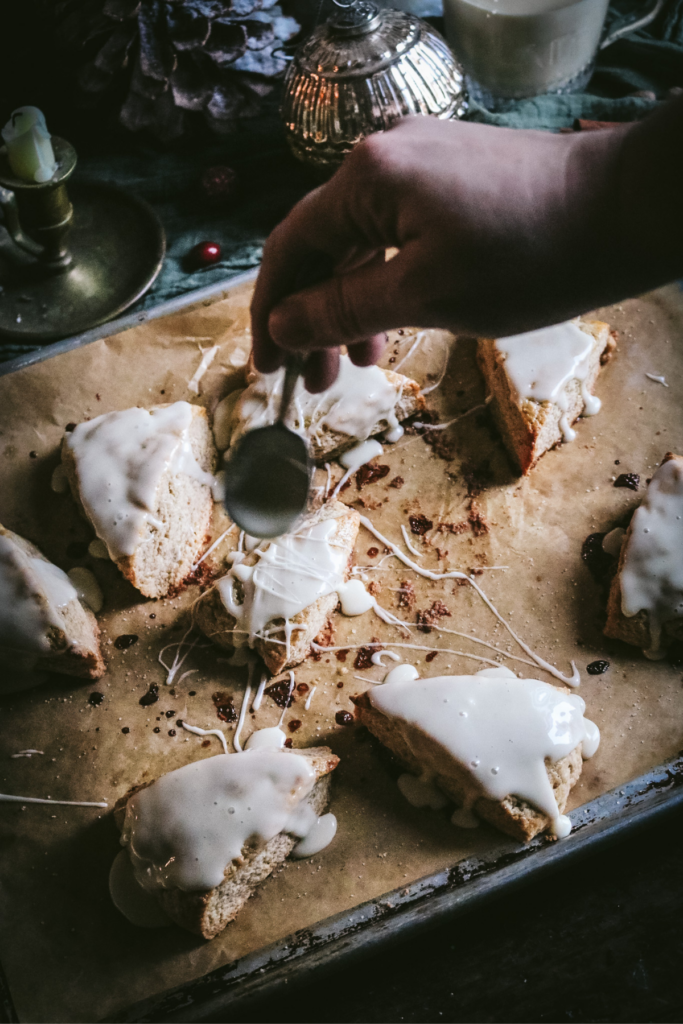
- Drizzle or spoon the eggnog glaze over the scones and allow it to set firm.
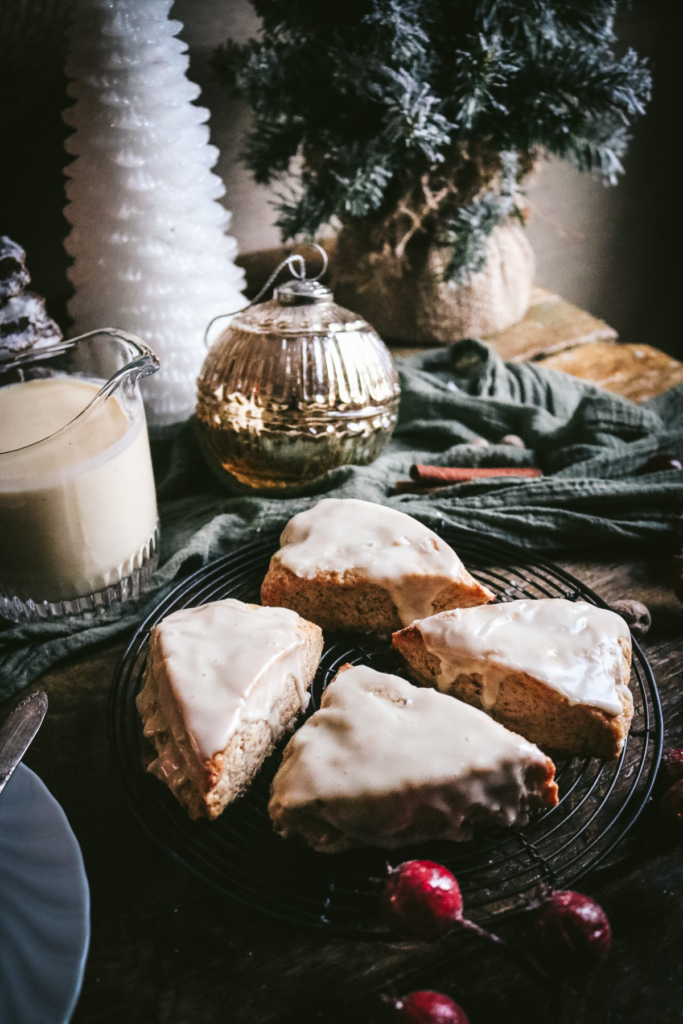
- Serve and enjoy!


🍂🍪 Want more cozy fall recipes?
My brand new recipe ebook, The Cozy Season Bakebook, has 20 seasonal bakes that taste like a love letter to fall!
You can expect all the most iconic fall flavors, like cinnamon apple, pumpkin spice, maple, pecans, and more.
It’s also intentionally low-tech and beginner-friendly, so anyone can bake along!
Storing Suggestions
Scones are always best served fresh and warm from the oven. If you have any leftover scones, store them in an airtight container and refrigerate for 1-2 days. Although you normally want to leave them at room temperature, the eggnog glaze should be refrigerated.
You can also freeze the scone dough for several months at a time. Just thaw and bake whenever you’d like one!
Tips & Variations
- Make them by hand. If you don’t like to use a food processor, add all of the dry ingredients and butter to a large bowl. Cut in the butter with a pastry blender until it looks sandy and then add the eggnog. You generally need to add more liquid when you make them by hand. Press the mixture into a ball, press down, and refrigerate like normal.
- Add some rum. Rum and eggnog are a classic combination. Feel free to replace part of the eggnog in the glaze with about 1/2 tsp of rum (or bourbon) and whisk in.
- Add some crunch. For more texture, add some chocolate chips, cinnamon chips, or chopped pecans.
- Adjust the shape or size. I often like to use a bench scraper to cut the scones into mini scones. You can also make square scones or cut them with a cookie cutter to make whichever shape you’d like. It’s the holidays, right? It’s worth it to go a little over the top.
How to Serve
We enjoy these as a quick after-dinner dessert or with a hot cup of coffee for a holiday brunch. Whether you want to serve them as a breakfast or dessert, they taste great any time of the day!
They’re nice served alongside our chewy honey gingerbread cookies, too.
FAQs
After making dozens and dozens of scones, I’m a major fan of using the food processor. Many people say this method causes you to overwork the dough and potentially activate the gluten. Sure, if you blend the mixture for a long time, yes, you can have problems. But you really only need to blend for maybe 10 seconds at most, which is nowhere near enough to ruin your dough.
I start by mixing in the butter with about 5 pulses, then blend for 5-10 seconds. That’s it. The cold blades keep the mixture cold (unlike my hot little hands) and it breaks the mixture down into tiny little crumbles that all result in a perfectly flaky texture. It’s great for making pie crusts, biscuits, and the most tender scones ever!
Nope. You do need to form the mixture into a ball, which requires gently kneading until a dough forms. However, I like to do it directly on my piece of parchment paper. This prevents me from adding extra flour, which can make the scones dry and bland, and minimizes the mess. If the scone dough is too messy to knead without flour, something is wrong anyway. Pop it in the fridge and let it firm up first!
Related Recipes
If you made this recipe, please leave a comment or ask a question below! I’d love to hear what you think or troubleshoot any issues.
Get my FREE Homestead Kitchen Supply List to make it easier than ever to cook and bake from scratch.
Want more seasonal recipes? Subscribe for email updates or follow Milk Glass Home & Kitchen on social media. Join my Facebook Group Seasonal Slow Living to become part of the community!
Easy Eggnog Scones with Eggnog Glaze
Equipment
- Sheet pan
- Parchment paper
- Sharp knife
- pastry brush (optional)
- small bowl
Ingredients
For the eggnog scone dough
- 2 cups all purpose flour
- 1/2 tsp kosher salt
- 2 tsp baking powder
- 1/3 cup cane sugar
- 1 tsp cinnamon
- 1/4 tsp nutmeg
- 4 ounces unsalted butter, 1 stick; very cold; cut into small cubes
- 1/2 cup eggnog, plus 1-2 tbsp to brush the tops of the scones before baking
For the eggnog glaze
- 1 cup powdered sugar
- 1 1/2 tbsp eggnog
Instructions
Prepare the dough
- Line a sheet pan with parchment paper.
- Add the flour, salt, baking powder, sugar, spices, and cubed butter into the bowl of a food processor.2 cups all purpose flour, 1/2 tsp kosher salt, 2 tsp baking powder, 1/3 cup cane sugar, 1 tsp cinnamon, 1/4 tsp nutmeg, 4 ounces unsalted butter
- Pulse to combine. The mixture should look sandy.
- Add the eggnog and blend for 5-10 seconds or until the mixture pulls away from the sides of the bowl and looks like coarse crumbs.1/2 cup eggnog
- Turn out onto the prepared baking sheet and knead gently until it comes together. Press into a 1-inch tall circle and refrigerate for at least 15-20 minutes. (Feel free to make them to this point the night before, then cover with parchment paper and refrigerate until you’re ready to bake.)
Bake the scones
- Preheat the oven to 375 F.
- Once the oven is preheated, cut the scones into wedges with a sharp knife and brush the scones with a small amount of eggnog and bake for 15-18 minutes. The bottoms and sides should be slightly golden brown.
- Allow the scones to rest on the tray and cool for at least 5-10 minutes.
Prepare and glaze
- While cooling the scones, whisk together the powdered sugar and eggnog. Tip: Start with half as much powdered sugar, whisk it in, then add the rest.1 cup powdered sugar, 1 1/2 tbsp eggnog
- Drizzle or spoon the eggnog glaze over the scones and allow it to set firm.
- Serve and enjoy!
Notes
Nutrition
Did you try this recipe?
Post a photo and tag @milkglasshome!Pin this recipe for later!


I will have to make some adjustments for diabetes doing keto, but these look pretty good!
My family has a tradition of driving about an hour away to a small coastal town where there is a traditional British Tea Restaurant. This tradition is over 40 years old, and began with my parents, now passed away. They serve several English Teas, but we always get the High Tea, which has everything. A few years ago, they were really nice and sold me the tablecloths, tea cozy’s, salt and pepper (made into tea pots)so I could send to send to my daughter who had moved across the states to New Orleans so she could feel like home.
I like to make my own version of High tea sometimes at home, and scones are something that I haven’t had a recipe for. I prefer simple, plain scones to the multitude of flavored ones available that seem to be the only ones you can buy.
Recently, I even found a recipe for clotted cream, SO EASY! And for lemon curd without sugar.
So, thank you for this recipe! and sorry this is long and TMI.