This post may contains affiliate links. We may earn a commission, at no additional cost to you, if you make a purchase via our links. See our disclosure for more information.
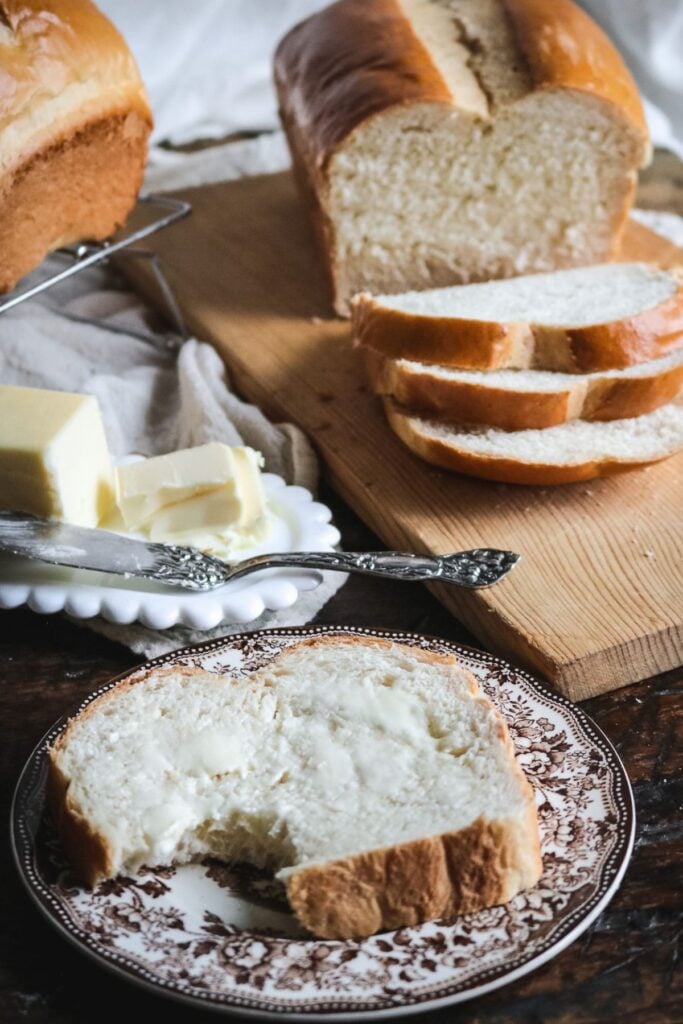
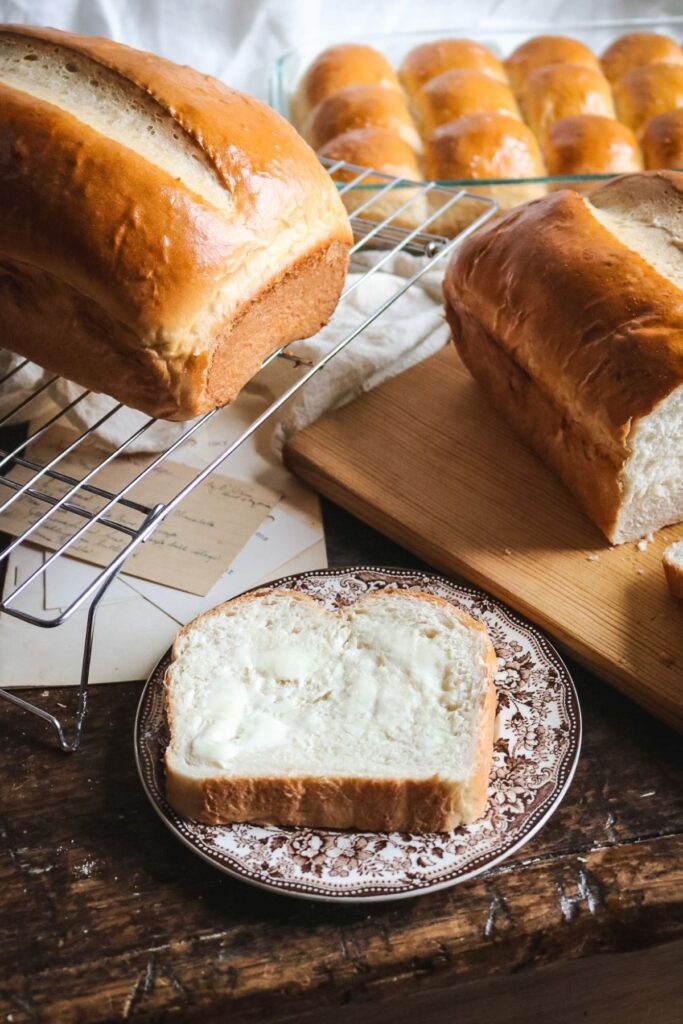
There is absolutely nothing better than the smell of freshly baked bread, and you can easily make super soft, fluffy homemade sandwich bread even as a beginner! This recipe always tastes like it was baked in a bakery, but is made with about 6 simple ingredients.
Don’t shy away from it because of the bread flour; that’s truly the secret to professional-tasting bread!
I think every home baker aspires to bake a delicious loaf of homemade bread, but many are too scared to try.
Or maybe they tried in the past and things didn’t turn out right. They hold themselves back thinking it would be too hard and they’d mess things up.
But just like anything, this is an opportunity for a growth mindset.
Baking bread is easy if you let it be easy. There are reasons for every ingredient and the order in which they are prepared, so it’s essential to really read the recipe at least once before you get started.
I’ve also included a detailed photo tutorial below so you’ll know what the dough should look like, how to shape the loaves, and everything.
Trust me – you can absolutely do this and this ultra easy homemade sandwich bread is one you’ll want to make every week. It’s a super soft but still sliceable white bread with a nice, mild flavor and a good chew. Great for toast, sandwiches, and anything else!
If you want to start baking more bread at home, try these homemade dinner rolls! They follow a very similar recipe and are so incredibly soft and tender.
Ingredients
Bread flour
The most important part of this recipe is the bread flour. I know that many home bakers don’t necessarily have it on hand, but consider this your sign to grab some at the store.
Yes, you can use all purpose flour instead, but if you’ve ever baked homemade bread before and thought it tasted kind of dry or crumbly, that’s one of the reasons.
Bread flour is higher in protein, which helps improve gluten development. That’s what makes pizza dough chewy, and bread flour is an absolute game-changer.
The big bag of King Arthur bread flour from Costco is pretty affordable, and is my go-to for all white bread recipes and doughs.
Active dry yeast
Beyond this, you really need to make sure your yeast is active. There are two main types of yeast – active and instant. Instant yeast does not need to be woken up with warm water and will start working instantly (hence the name).
Active yeast does need a wake up time, which this recipe anticipates.
But more than that, you need to make sure that your active yeast is actually active. If you’ve been working with a jar in your pantry for two years, it is likely not alive anymore and will not rise.
Water temperature
One of the most common mistakes people make is to use water that is too hot. This isn’t just an arbitrary temperature; if your water is too hot, it will kill your yeast and not allow your bread to rise.
If you have an instant read thermometer, then that’s perfect! Just temp the water and don’t use it until it is between 105-110F.
If you don’t have one, you only want water that feels slightly warm. If it feels hot to you, it’s too hot. Think skin temperature but just a little warmer.
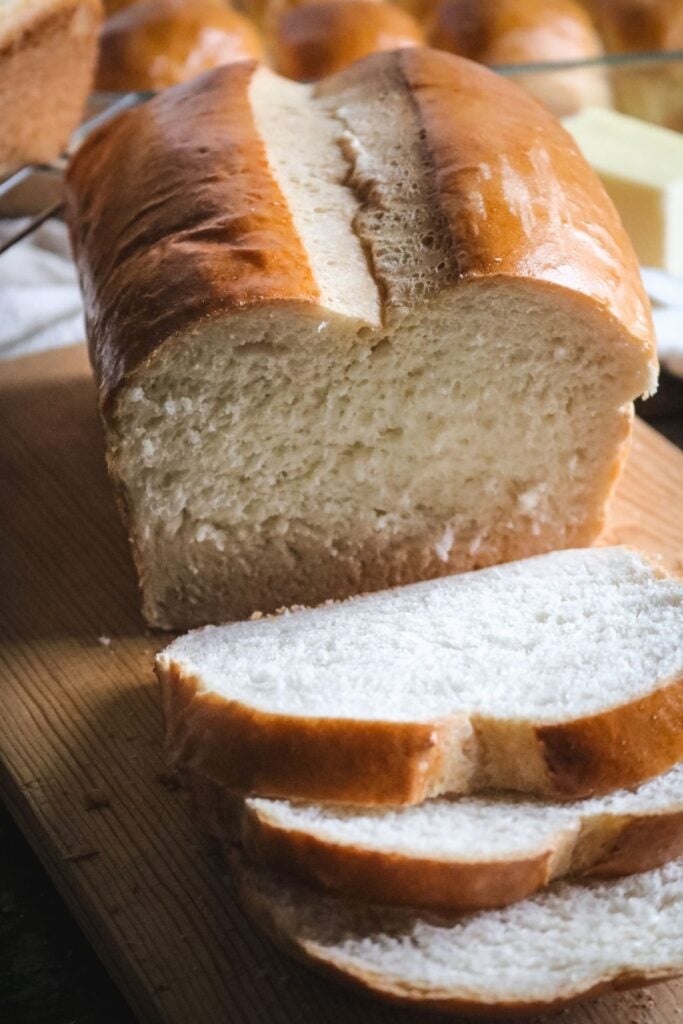
How to Make Soft and Fluffy Sandwich Bread
The recipe card below will guide you through every step and is handy to print, but I wanted to offer a photo tutorial so any reluctant bakers out there can nail the whole process.
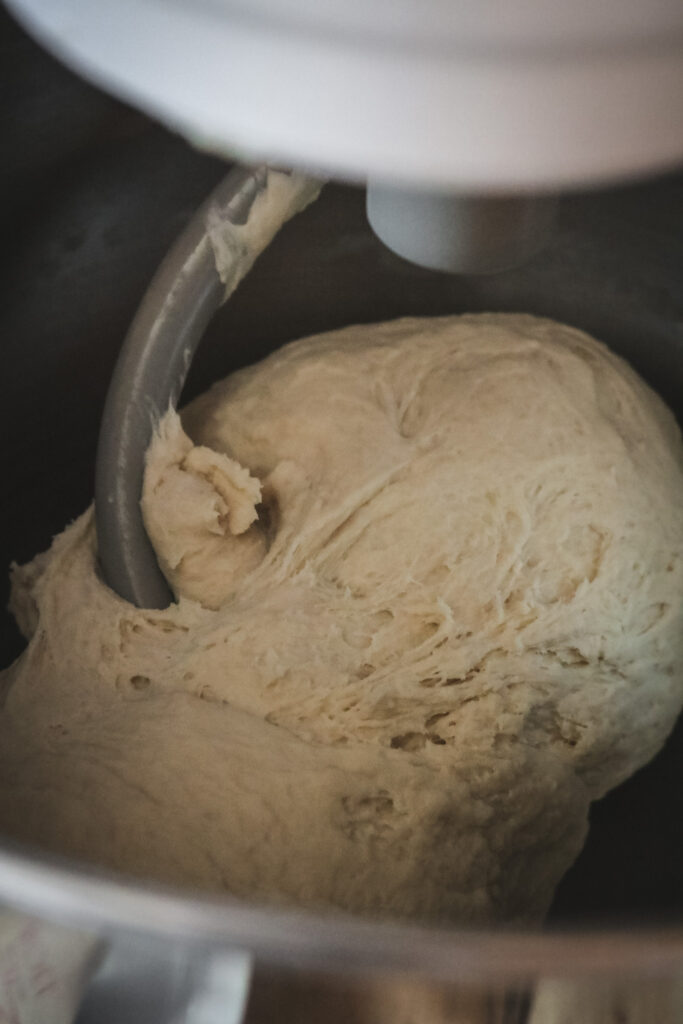
Step 1: Combine water, yeast, 2 cups of bread flour, and sugar in the bowl of a stand mixer or your mixing bowl. Allow to sit undisturbed in a warm place for about 15-20 minutes or until you see the yeast start start to bubble and foam.
Step 2: Then, add the remaining flour, melted butter, and salt, and begin kneading on low speed with a dough hook. If using your hands, it will take a while (probably 20-30 minutes), but it is totally doable.
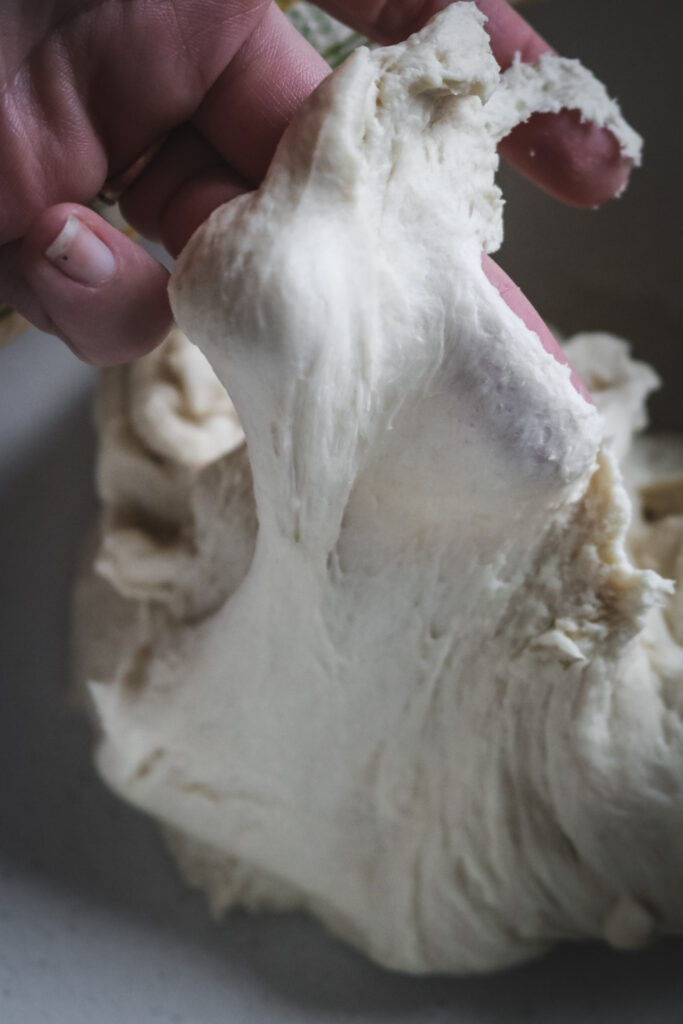
Step 3: Let the mixture knead until the dough ball is soft and smooth.
I always recommend doing the windowpane test. If you pull on the dough, it should stretch (not rip) and ideally, you should be able to stretch it thin enough to see through it. Can you see a little light poking through my dough beneath my fingers?
If it isn’t exactly that thin but still stretchy, that’s totally fine. I just let my mixer run for about 10-15 minutes and check on the dough a couple of times.
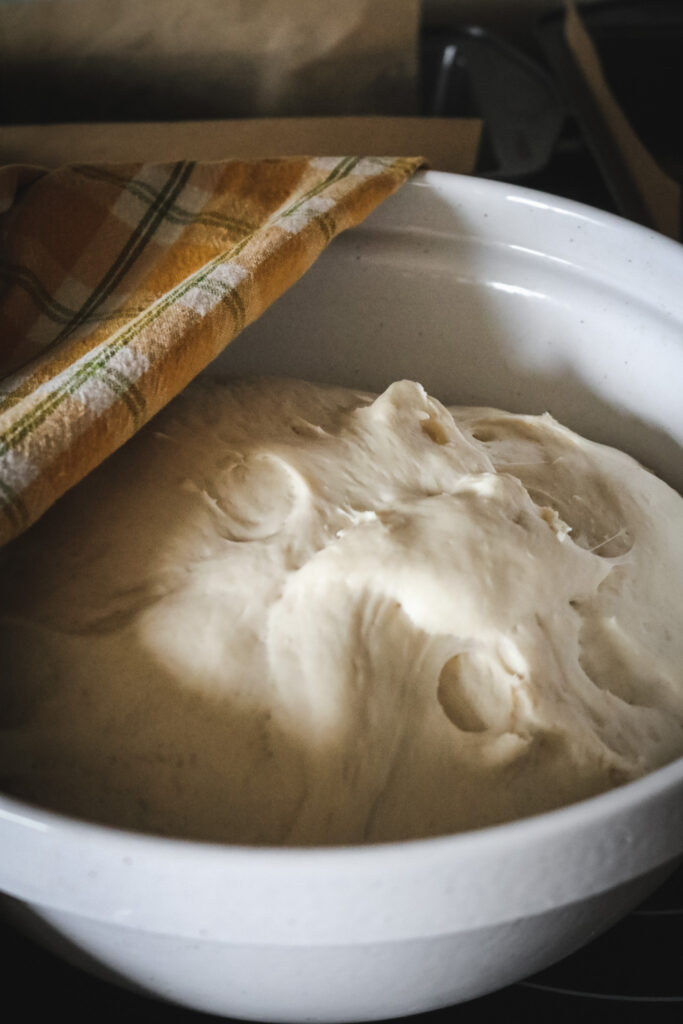
Step 4: At this point, the dough is ready to do its first rise. Add a a splash of oil to a large mixing bowl, and spread it evenly, then place the dough on top. Cover with a kitchen towel and place in a warm spot, like on your stovetop. Let it rise until doubled (about 45 minutes to an hour).
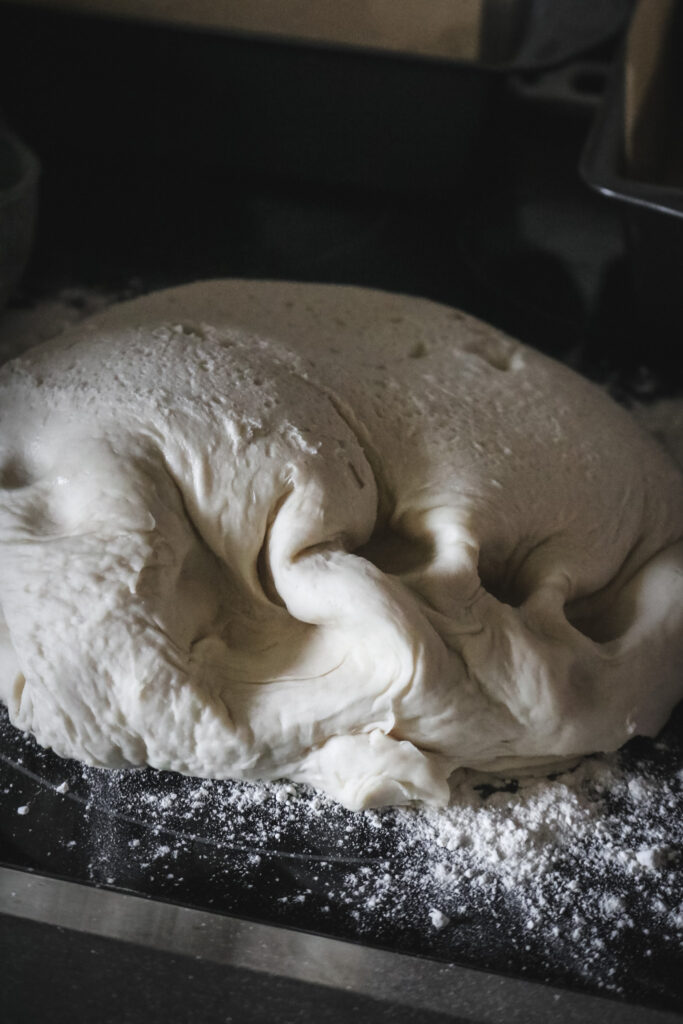
Step 5: Then, sprinkle flour generously over a clean work surface and dump the dough from the mixing bowl. Divide the dough into two even sections and set one piece to the side.
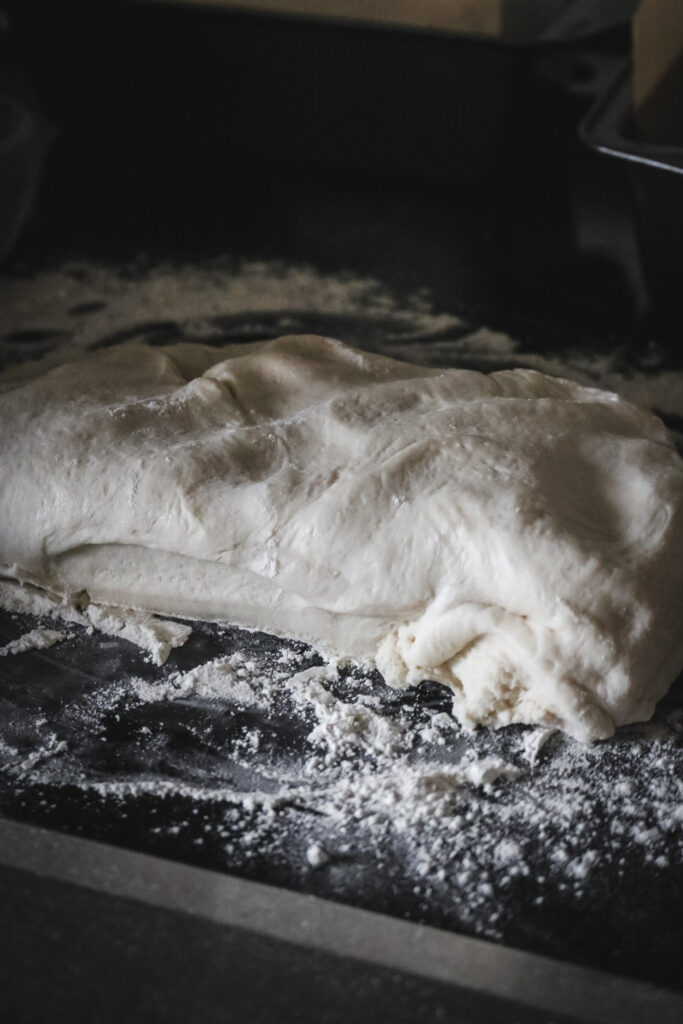
Step 6: Using your fingers, spread one half of the dough out into a rectangular shape. It doesn’t need to be perfect; just generally rectangular. I make mine roughly about 8 by 12-14 inches or so.
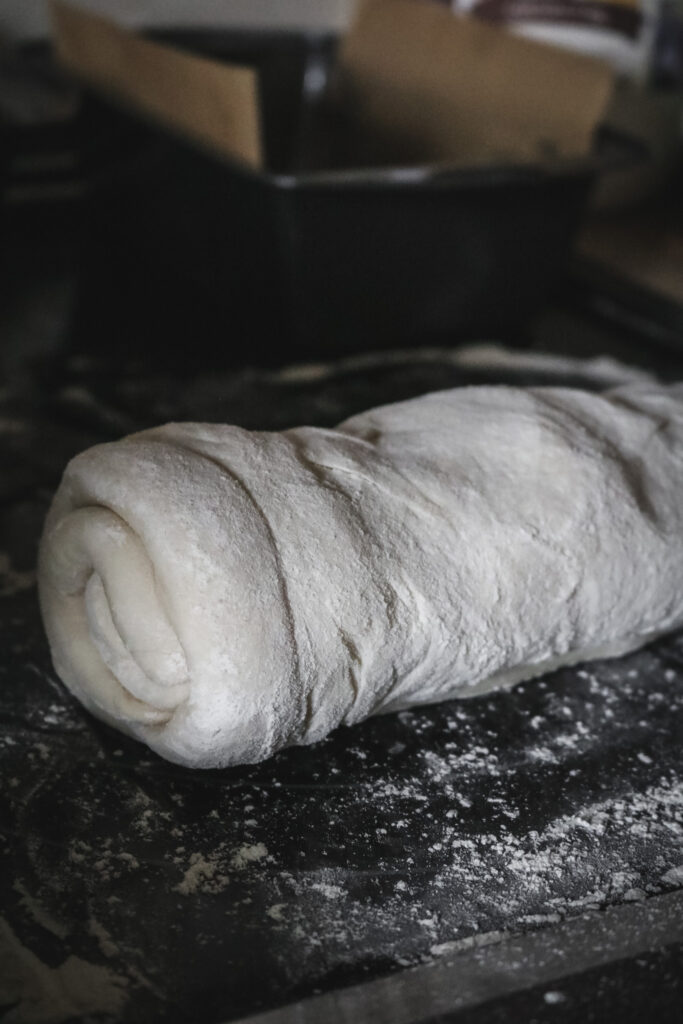
Step 7: Tightly roll the rectangle into a log. Flip it over and use your fingers to pinch together any seams you’ve made.
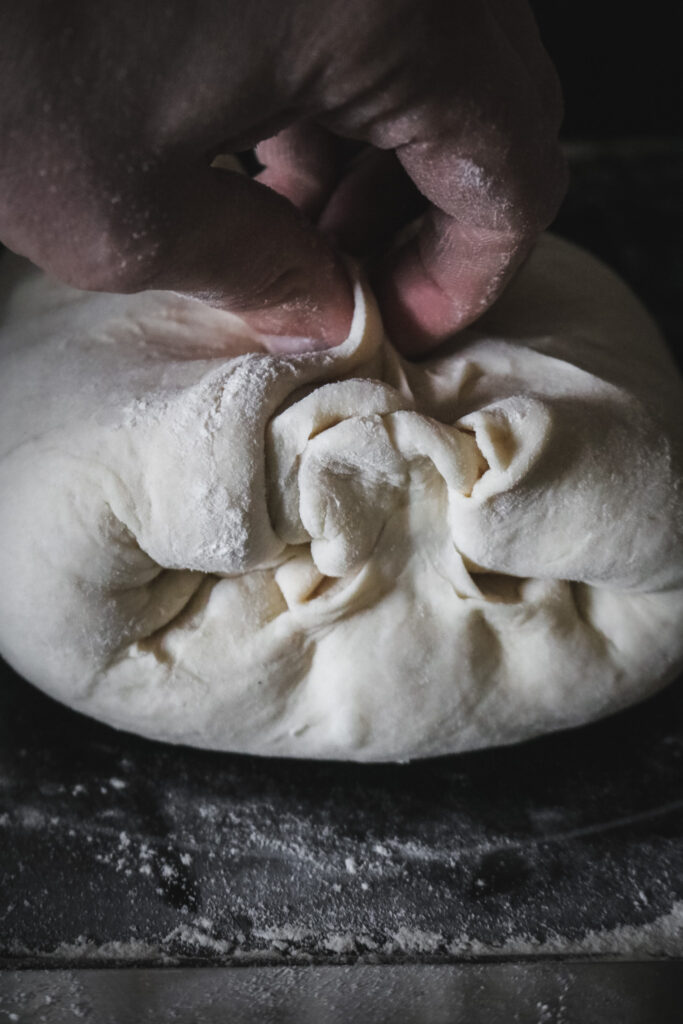
Step 8: Fold the left and right sides of the log together, pinching the dough where they meet to hold it together.
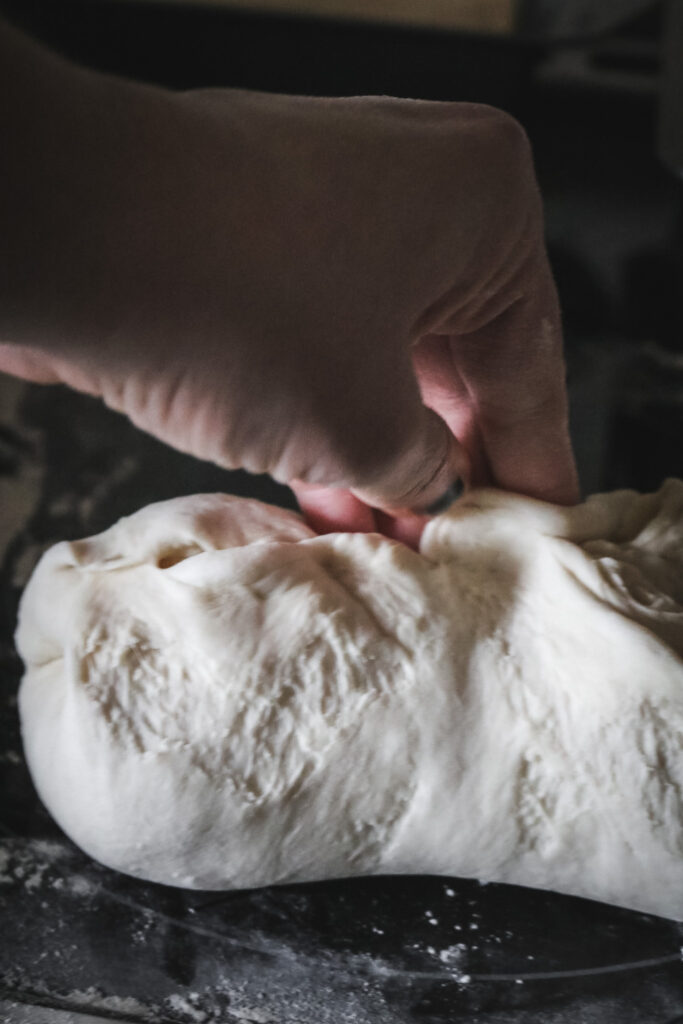
Step 9: The goal for this step is to pull the dough from the longer sides together. Place your hands under each long side of the log with the joined seam facing up. Carefully push upwards to stretch the sides up and then press together so they match up in the middle. Pinch the seams again.
At this point, you can flip the log over. If you need to, you can gently roll or pull the log to make it a better shape for the pans. The dough will grow as it rises, so it doesn’t need to be the full length of the pan.
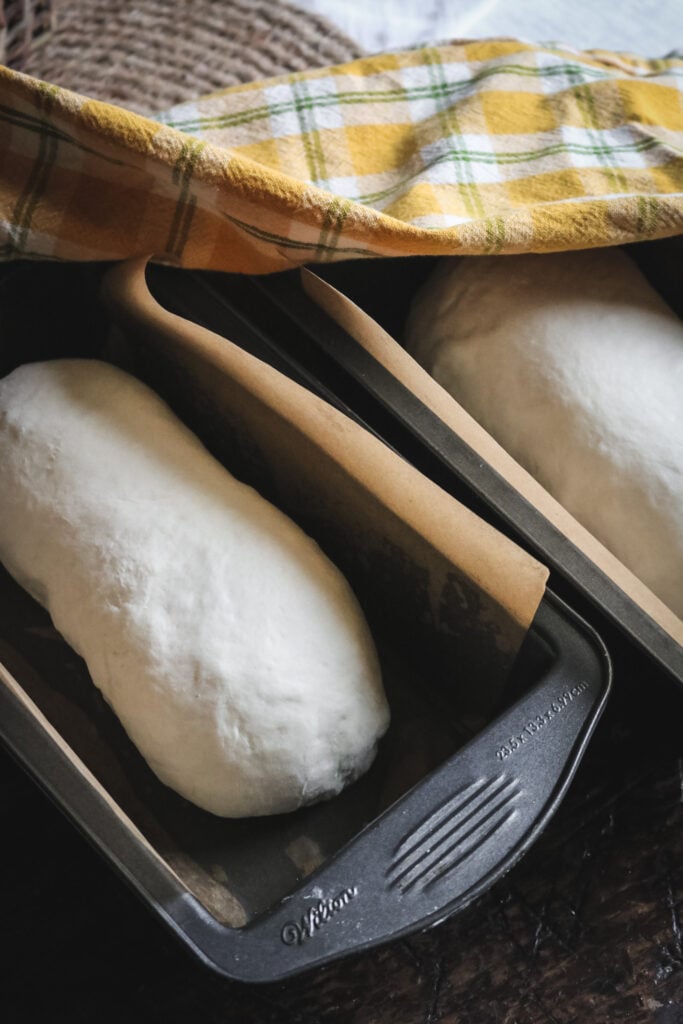
Step 10: Place in an oiled loaf pan lined with a strip of parchment for easy lifting (optional). Cover with a clean kitchen towel and allow the bread to rise for the final time (45 minutes to an hour). I usually place the loaves on my glass stovetop.
You will know the bread is ready to bake when the dough rises about 1 inch taller than the pans.
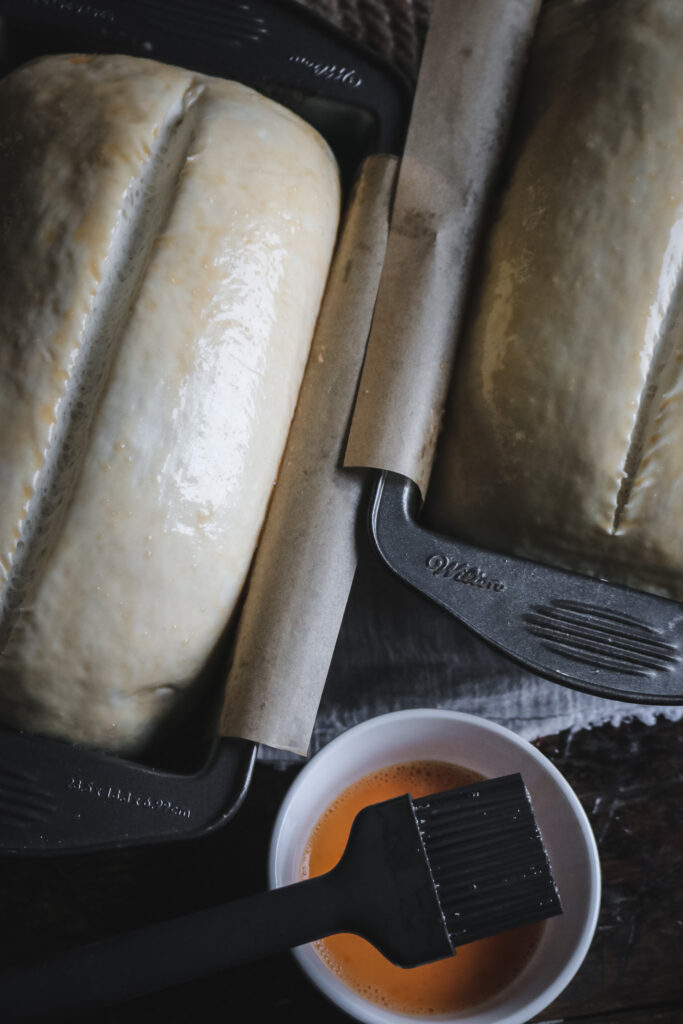
Step 11: Then, preheat oven to 375 F. Just before baking, brush loaves with egg wash. If you’d like, you can use a bread lame or sharp knife to score down the center. Press down about 1 – 1 ½ inches.
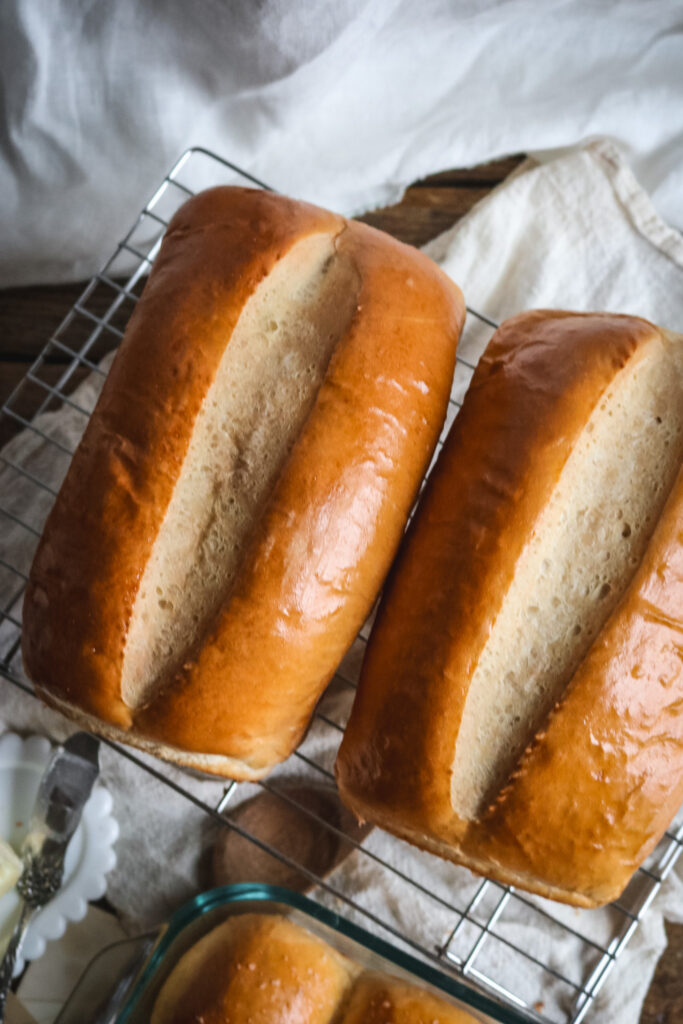
Step 12: Bake at 375 F for 30 minutes. If you’re worried about doneness, you can use an instant read thermometer to check the center. It should read about 195-205 F when properly baked.
Let the bread cool in the pans for a bit, then transfer to a wire rack. Cool completely to room temperature before slicing.
Storing Suggestions
Without the preservatives of storebought bread, the homemade stuff does not last as long.
I like to let my loaves cool completely, then I store both in a large ziploc bag (we get the biggest IKEA ones, which hold two loaves at once, and we reuse them).
Keep the bread at room temperature and plan to eat within 3-4 days.
For longer storage, keep one out to eat and freeze the other. Just let it thaw in the bag in the fridge and use like normal.
Tips & Variations
- Spoon the bread flour into your measuring cup and level it off evenly OR use a kitchen scale to weigh it out. This is extremely important to avoid overly dense, dry bread!
- I usually use dark metal loaf pans. If you use a different type of pan, you may need to adjust the bake time slightly.
- If you feel worried about knowing when bread is done, you can use an instant thermometer! The center of the loaf should be about 195-205F when done.
How to Serve
Everyone knows how to serve bread, right? But many people don’t necessarily know that you need a certain type of knife to cut smooth, even slices.
My favorite knife for slicing loaves of bread is a granton edge knife, which is specifically made for this purpose. If you don’t have that, use a long serrated knife (or a bread knife) and gently saw into the bread without compressing it down. Crucial!
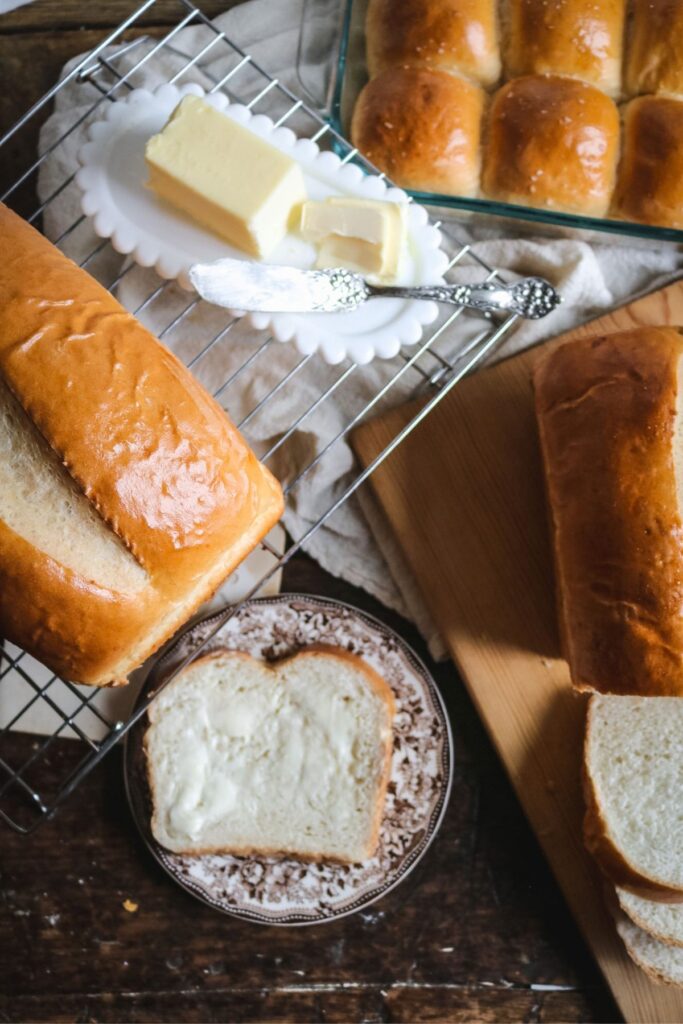
Then, you can slather it with regular butter, whipped maple brown butter (my absolute favorite), or a generous dollop of homemade marionberry jam. This is the kind of bread you’ll want to eat everyday!
More Yeast Dough Recipes
If you want a soft, slightly sweet dough, my homemade honey wheat sourdough sandwich bread is just as easy to make and stays soft for days.

If you made this recipe, please leave a comment or ask a question below! I’d love to hear what you think or troubleshoot any issues.
Get my FREE Homestead Kitchen Supply List to make it easier than ever to cook and bake from scratch.
Want more seasonal recipes? Subscribe for email updates or follow Milk Glass Home & Kitchen on social media. Join my Facebook Group Seasonal Slow Living to become part of the community!
Soft Homemade Sandwich Bread {2 Loaves}
Equipment
- Two metal loaf pans
- Stand mixer with dough hook
- clean kitchen towel
- Instant thermometer (optional)
- Brush for adding the egg wash
- Wire rack for cooling
Ingredients
To activate the yeast
- 2 cups bread flour, always spoon the flour into the measuring cup and level it out (240g)
- 2 cups warm water, 105-110 degrees F
- 1 Tbs active yeast
- 3 Tbs white sugar
For the dough
- 4 cups bread flour, spoon the flour into the measuring cup and level it out (480g)
- 4 Tbs unsalted butter, melted
- 3 tsp kosher salt, use half as much if using table salt
For rolling
- 2-3 Tbs additional flour as needed
For the egg wash
- 1 egg
- 1 tsp water
Instructions
Activate the yeast
- Combine water, yeast, 2 cups of bread flour, and sugar in the bowl of a stand mixer or your mixing bowl. Allow to sit undisturbed in a warm place for about 15-20 minutes or until you see the yeast start start to bubble and foam.2 cups bread flour, 2 cups warm water, 1 Tbs active yeast, 3 Tbs white sugar
Knead the dough
- Then, add the remaining flour, melted butter, and salt, and begin kneading on low speed with a dough hook. If using your hands, it will take a while (probably 20-30 minutes), but it is totally doable.4 cups bread flour, 4 Tbs unsalted butter, 3 tsp kosher salt
- Let the mixture knead until the dough ball is soft and smooth. I always recommend doing the windowpane test. If you pull on the dough, it should stretch (not rip) and ideally, you should be able to stretch it thin enough to see through it.If it isn’t exactly that thin but still stretchy, that’s totally fine. I just let my mixer run for about 10-15 minutes and check on the dough a couple of times.
First rise
- At this point, the dough is ready to do its first rise. Add a a splash of oil to a large mixing bowl, and spread it evenly, then place the dough on top. Cover with a kitchen towel and place in a warm spot, like on your stovetop. Let it rise until doubled (about 45 minutes to an hour).
Shape the loaves
- Then, sprinkle flour generously over a clean work surface and dump the dough from the mixing bowl. Divide the dough into two even sections and set one piece to the side.2-3 Tbs additional flour as needed
- Using your fingers, spread one half of the dough out into a rectangular shape. It doesn’t need to be perfect; just generally rectangular. I make mine roughly about 8 by 12-14 inches or so.
- Tightly roll the rectangle into a log. Flip it over and use your fingers to pinch together any seams you’ve made.
- Fold the left and right sides of the log together, pinching the dough where they meet to hold it together.The goal for this step is to pull the dough from the longer sides together. Place your hands under each long side of the log with the joined seam facing up. Carefully push upwards to stretch the sides up and then press together so they match up in the middle. Pinch the seams again.
- At this point, you can flip the log over. If you need to, you can gently roll or pull the log to make it a better shape for the pans. The dough will grow as it rises, so it doesn’t need to be the full length of the pan.
Second rise
- Place dough in an oiled loaf pan lined with a strip of parchment for easy lifting (optional). Cover with a clean kitchen towel and let the dough rise for the final time (45 minutes to an hour) in a warm environment. You will know the bread is ready to bake when the dough rises about 1 – 1 ½ inch taller than the pans.
Bake the loaves
- Then, preheat oven to 375 F. Just before baking, brush loaves with egg wash (whisk together the egg and tsp of water). If you’d like, you can use a bread lame or sharp knife to score down the center. Press down about 1 – 1 ½ inches.1 egg, 1 tsp water
- Bake at 375 F for 30 minutes. If you’re worried about doneness, you can use an instant read thermometer to check the center. It should read about 195-205 F when properly baked.
- Let the bread cool in the pans for a bit, then transfer to a wire rack. Cool completely to room temperature before slicing. Store in an airtight container either in the fridge or on the counter.
Notes
Measure flour properly
One of the most important steps in this recipe is to use the right amount of flour. You do not necessarily have to have a kitchen scale, but you do need to know how to measure flour properly. You need to spoon flour into your measuring cup, then level it flat. If you scoop the measuring cup into your bag or container, you will almost always add more flour than you need, which can cause your bread to be dry. Otherwise, one cup of flour generally weighs about 120-125g. You can use a digital kitchen scale to measure out precise quantities every single time.Use fresh yeast
Always make sure your yeast is fresh and active before getting started! If the yeast doesn’t foam and bubble up in the first step, it may be dead and won’t rise.Watch your dough
The actual rising time will always vary depending on the temperature of your kitchen and other little micro factors. I recommend following your bread and its visual cues and not just following a timer. For the first rise, look for dough that has doubled in volume. If you poke the dough, the indentation should disappear in about 10 seconds. For the second rise, the center of the loaves should be at least 1 inch above the sides of the pan. You can see what the loaves look like before I bake in the recipe photos. If you go too long, the bread will be overproofed and will start to collapse and sink.Did you try this recipe?
Post a photo and tag @milkglasshome!Pin this recipe for later!