Homemade Sugar Cubes (DIY Sugar Cubes)
Homemade sugar cubes are one of the easiest projects and they're so much fun! The options are truly endless and they look amazing in their perfect little cube shapes. Add them to tea, save them for cocktail parties, or let one melt in your mouth like pure candy!
Equipment
- Sugar cube mold (this mold is a little shorter than a full cube)
- small mixing bowl
- spoon
- Bench scraper optional
- Dehydrator or oven with a sheet pan
Ingredients
- 1 cup granulated sugar (or infused vanilla sugar or lavender sugar, etc)
- 2 tsp water (or extracts)
Instructions
Make the Sugar Mixture
- Add all ingredients to a bowl and stir well to combine. Add more water if needed until it has the texture of wet sand (I found 2 teaspoons of water and 1 cup of sugar to be just right). It should clump if you squeeze it.
Fill the Molds
- Press sugar mixture into the silicone mold. Start in one area and press down with your fingers to compress the sugar. Continue pressing until you've filled as many cubes as you can.
- Use the bench scraper to flatten the backs of the cubes.
Dry & Store
- Place the sugar cube mold either in the dehydrator at 135 F or on a sheet pan in the oven at the lowest temperature it can handle (usually 170). Place a wooden spoon to keep the door from closing all the way.
- Let the sugar cubes dry until hard (1 hour in the oven or 2 hours in the dehydrator).
- Gently remove the sugar cubes from the mold over a sheet of parchment paper. If they are still soft at all, place the entire tray back into the oven or dehydrator until they are firm to the touch.
- Once fully dried, let the sugar cubes cool to room temperature, then store them in an airtight container in a cool, dry place.
- Serve and enjoy!
Notes
Feel free to add dried flowers, floral waters, or different extracts to adjust the flavor. I'm a big fan of adding citrus zests or fresh herbs as the flavor will mellow down just right after drying!
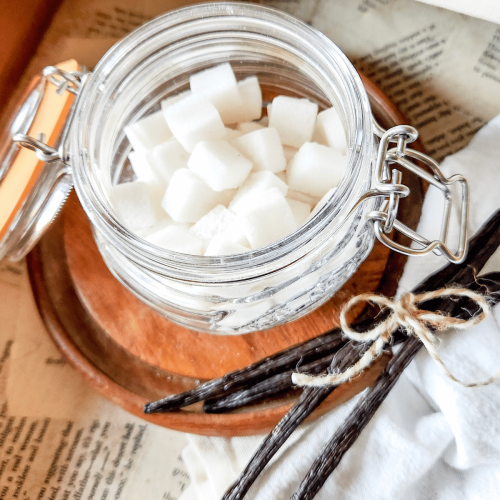
Be sure to store the homemade sugar cubes in an airtight container, like a mason jar. Add a little handmade label with twine for gifting!
- Start with less water. If you add too much water, you'll need to compensate by adding more sugar. It's easier to start with just 1 teaspoon of water and then adding a little bit more only if needed.
- Dry them out. There are some versions out there that call for just letting the silicone molds sit out overnight. There are also tons of people wondering why their sugar cubes are soft! You need to dry them out. This will preserve the shape and make them like the hard little sugar cubes from the store.
- Adjust the drying time. If you use larger molds or extra add-ins like lavender buds or vanilla beans, you may need to let the mixture dry longer.
- Make handmade labels. Giving these as a gift during the holiday season? Be sure to jar up the sugar cubes and attach a handwritten label!
- Use a food processor. If you're adding any dried flowers or herbs, just blend everything together in the food processor! The little pieces will become very fine, so you won't get big clumps of dried flowers in your tea.
- Get the right sugar. This recipe calls for regular white sugar, also called granulated sugar here in the US. You can also use caster sugar, but avoid using powdered or confectioner's sugar. Brown sugars, including turbinado and demerara, can also be used.